In this page:
This page provides instructions for creating concepts to your SNOMED CT extension using Simplex. The process is initiated by exploring the SNOMED CT browser, and identifying the proper parent for your concept. Then editing the spreadsheet with the details about your new concept, including the addition of relevant synonyms. Finally, uploading the spreadsheet into simplex, and checking that the concept has been created as intended. Review this video to see how this is done step by step.
Prerequisite steps:
Step-by-step instructions
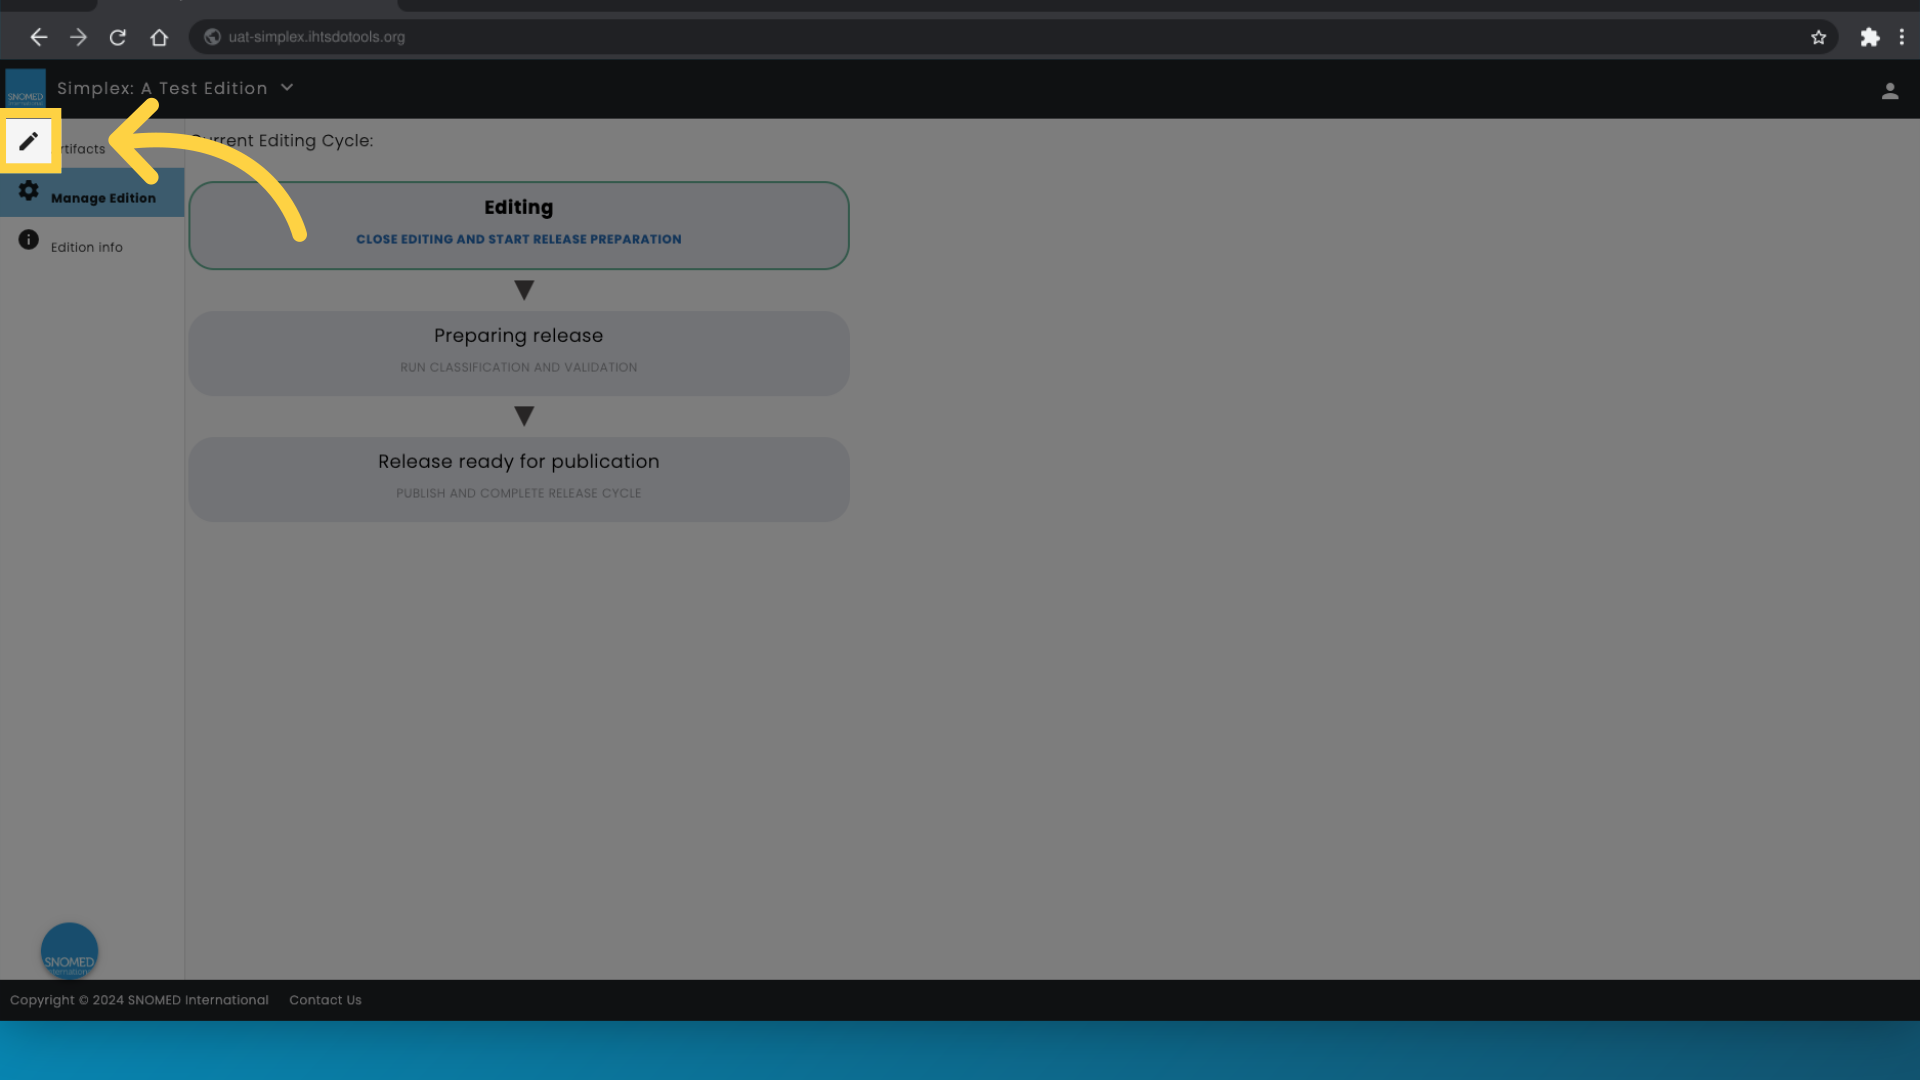
1. Click "Artifacts"
First, navigate to the extension artifacts manager area in Simplex.
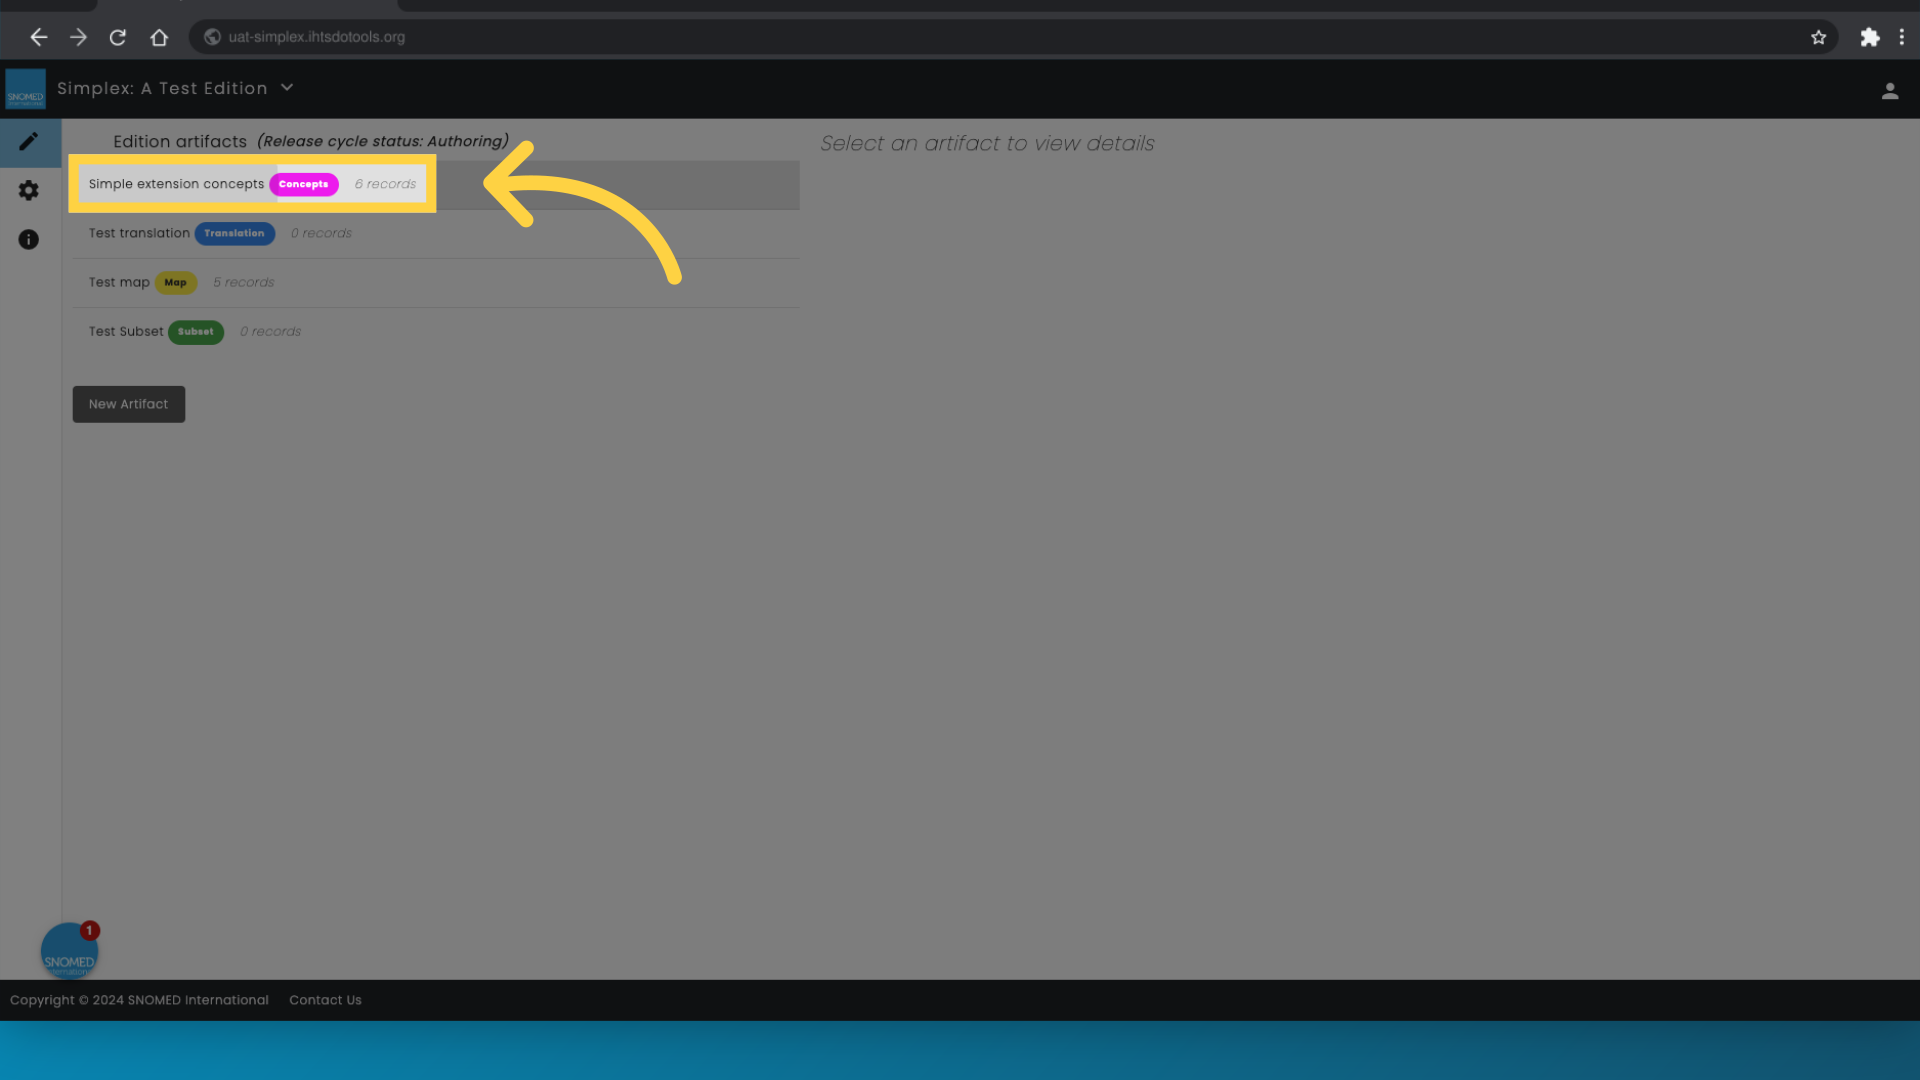
2. Click "Simple extension concepts"
Here, you'll notice that some concepts have already been added. These include the metadata concepts required to represent the extension plus any derivatives you have added. To view the concepts, and the details for managing these, click "Simple extension concepts".
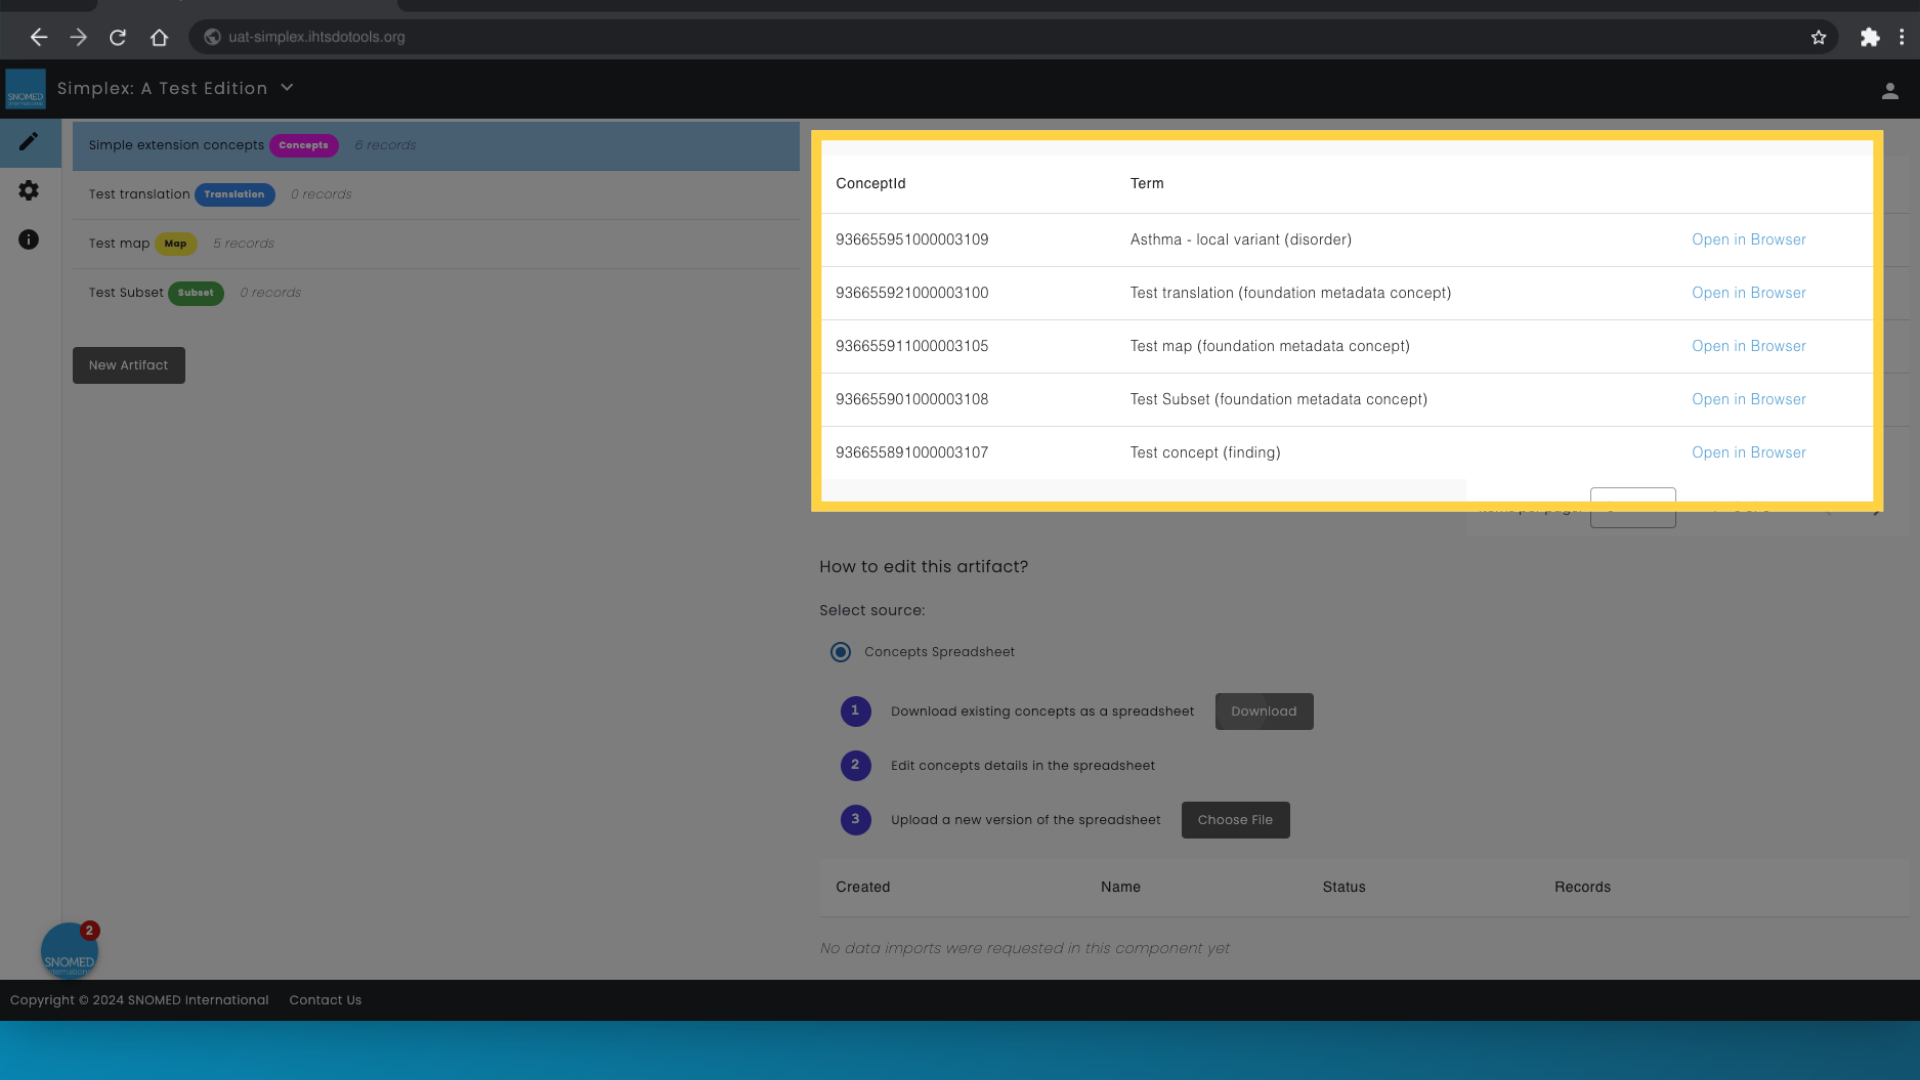
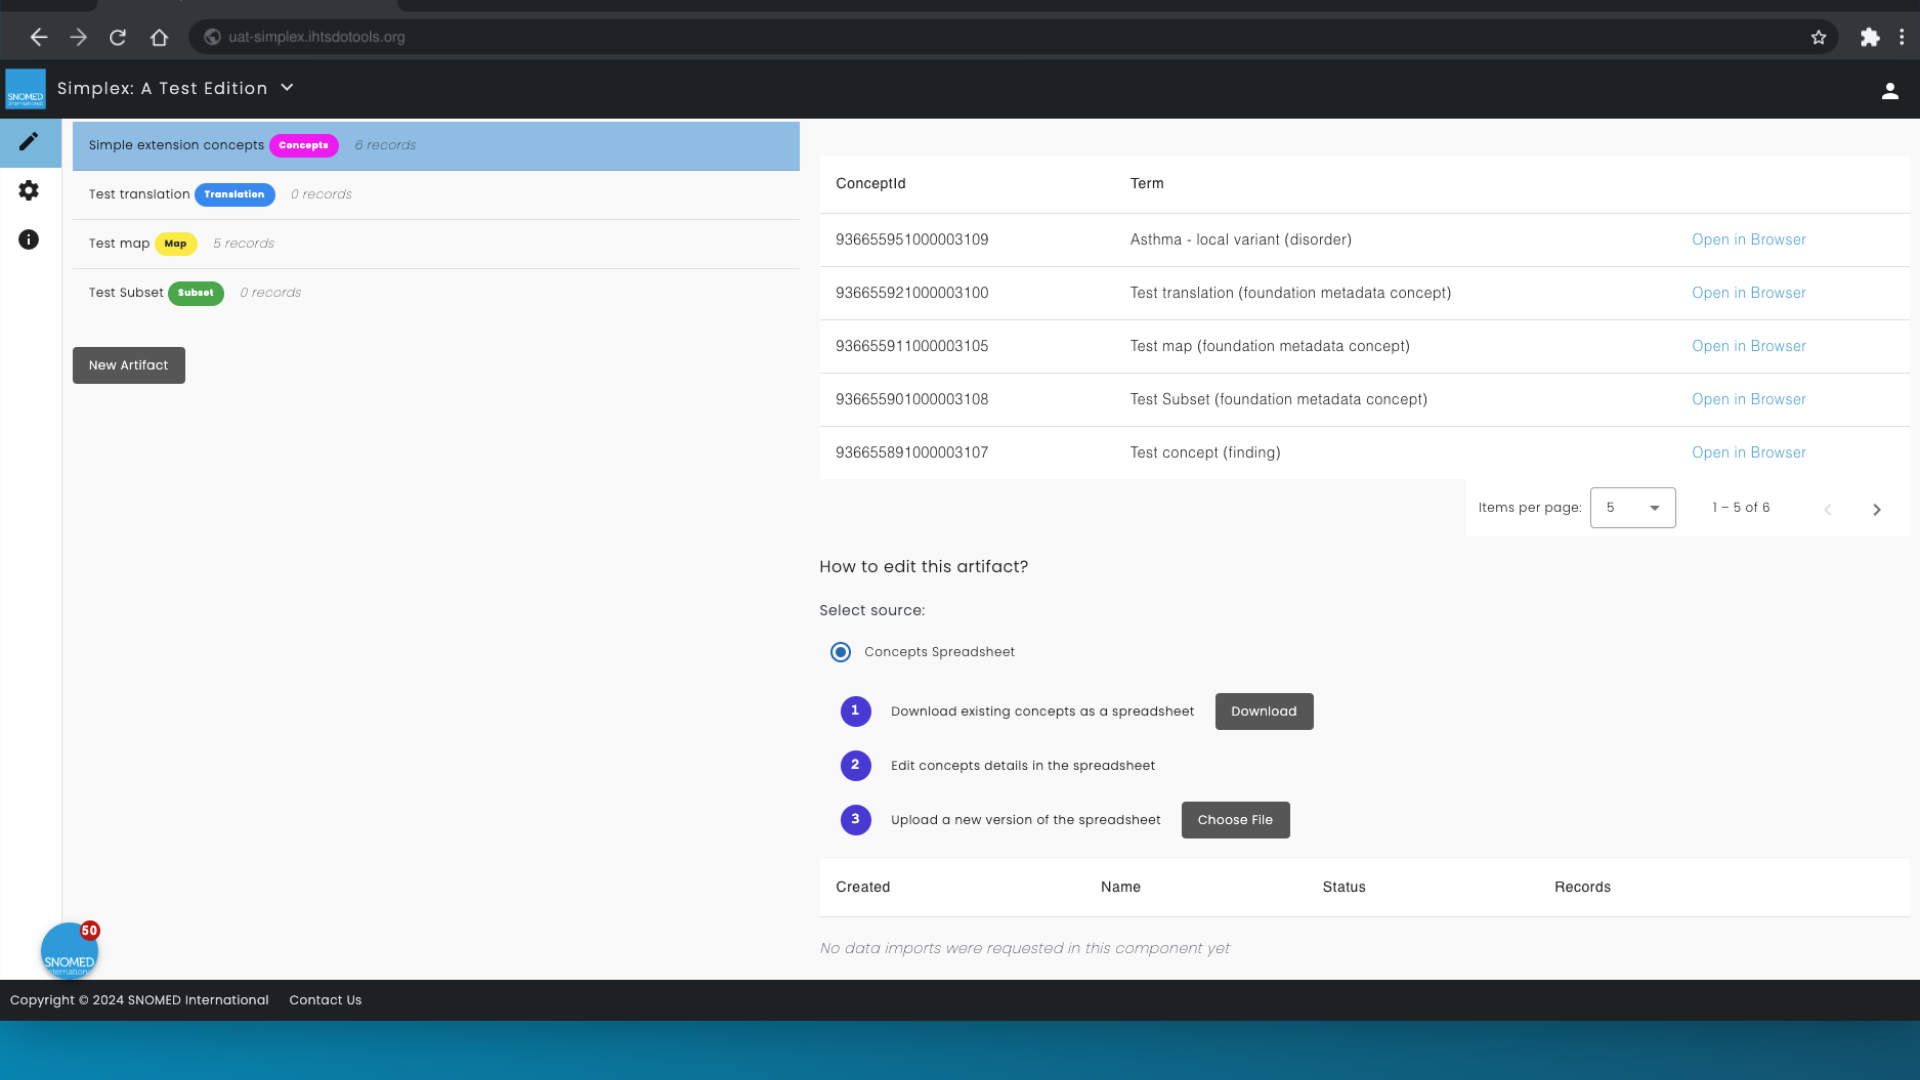
3. View concepts
Now, you see the concepts currently included in your extension to the right of the screen. Notice how you see the concepts naming and identifying the derivatives you have created. You will also find your module concept.
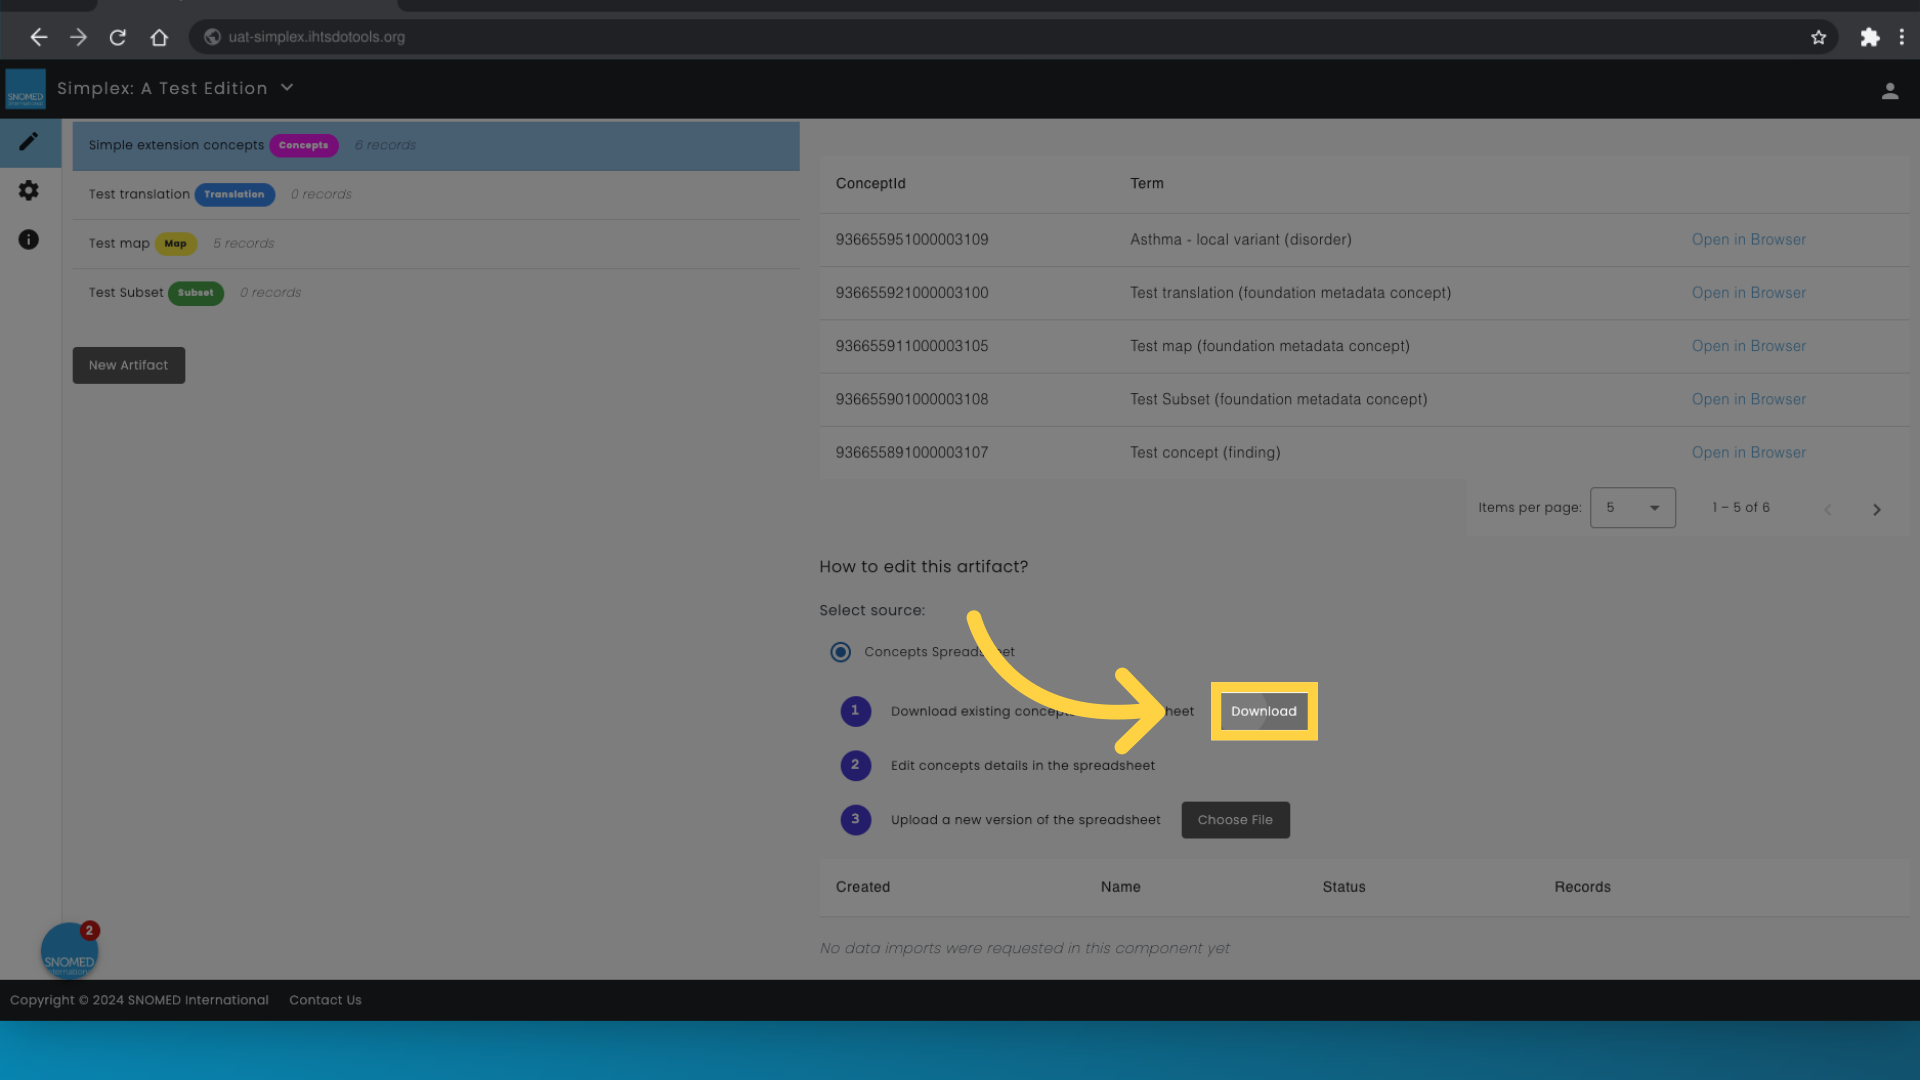
4. Click "Download"
To create a new concept for your extension, the first thing you need to do is to download the spreadsheet with the details about the concepts in your extension. Click the download button to the right of step 1 in the process description below the concepts.
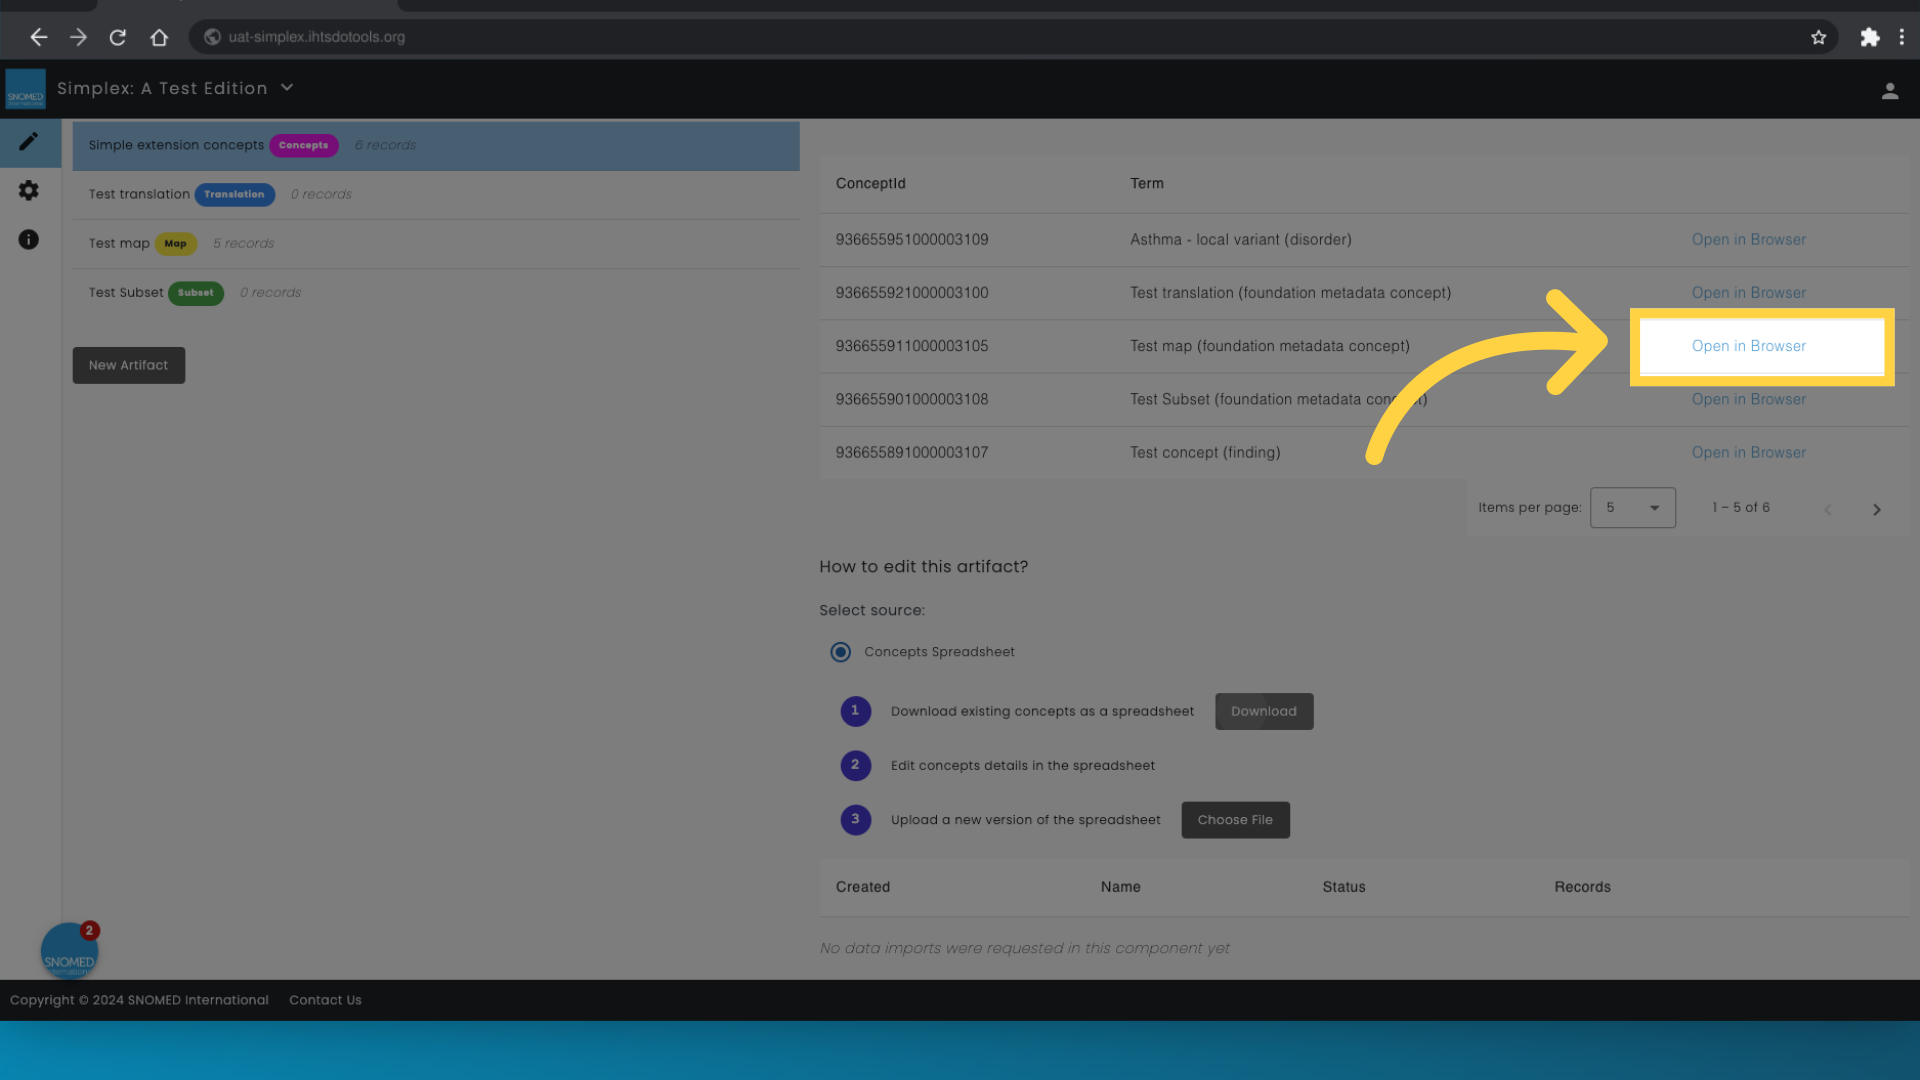
5. Access browser
Before editing the spreadsheet you just downloaded, you need to make sure that you know the details of the parent concept of your new extension concept. Therefore, go to your extension browser. You can do this by following the link next to any of your extension concepts
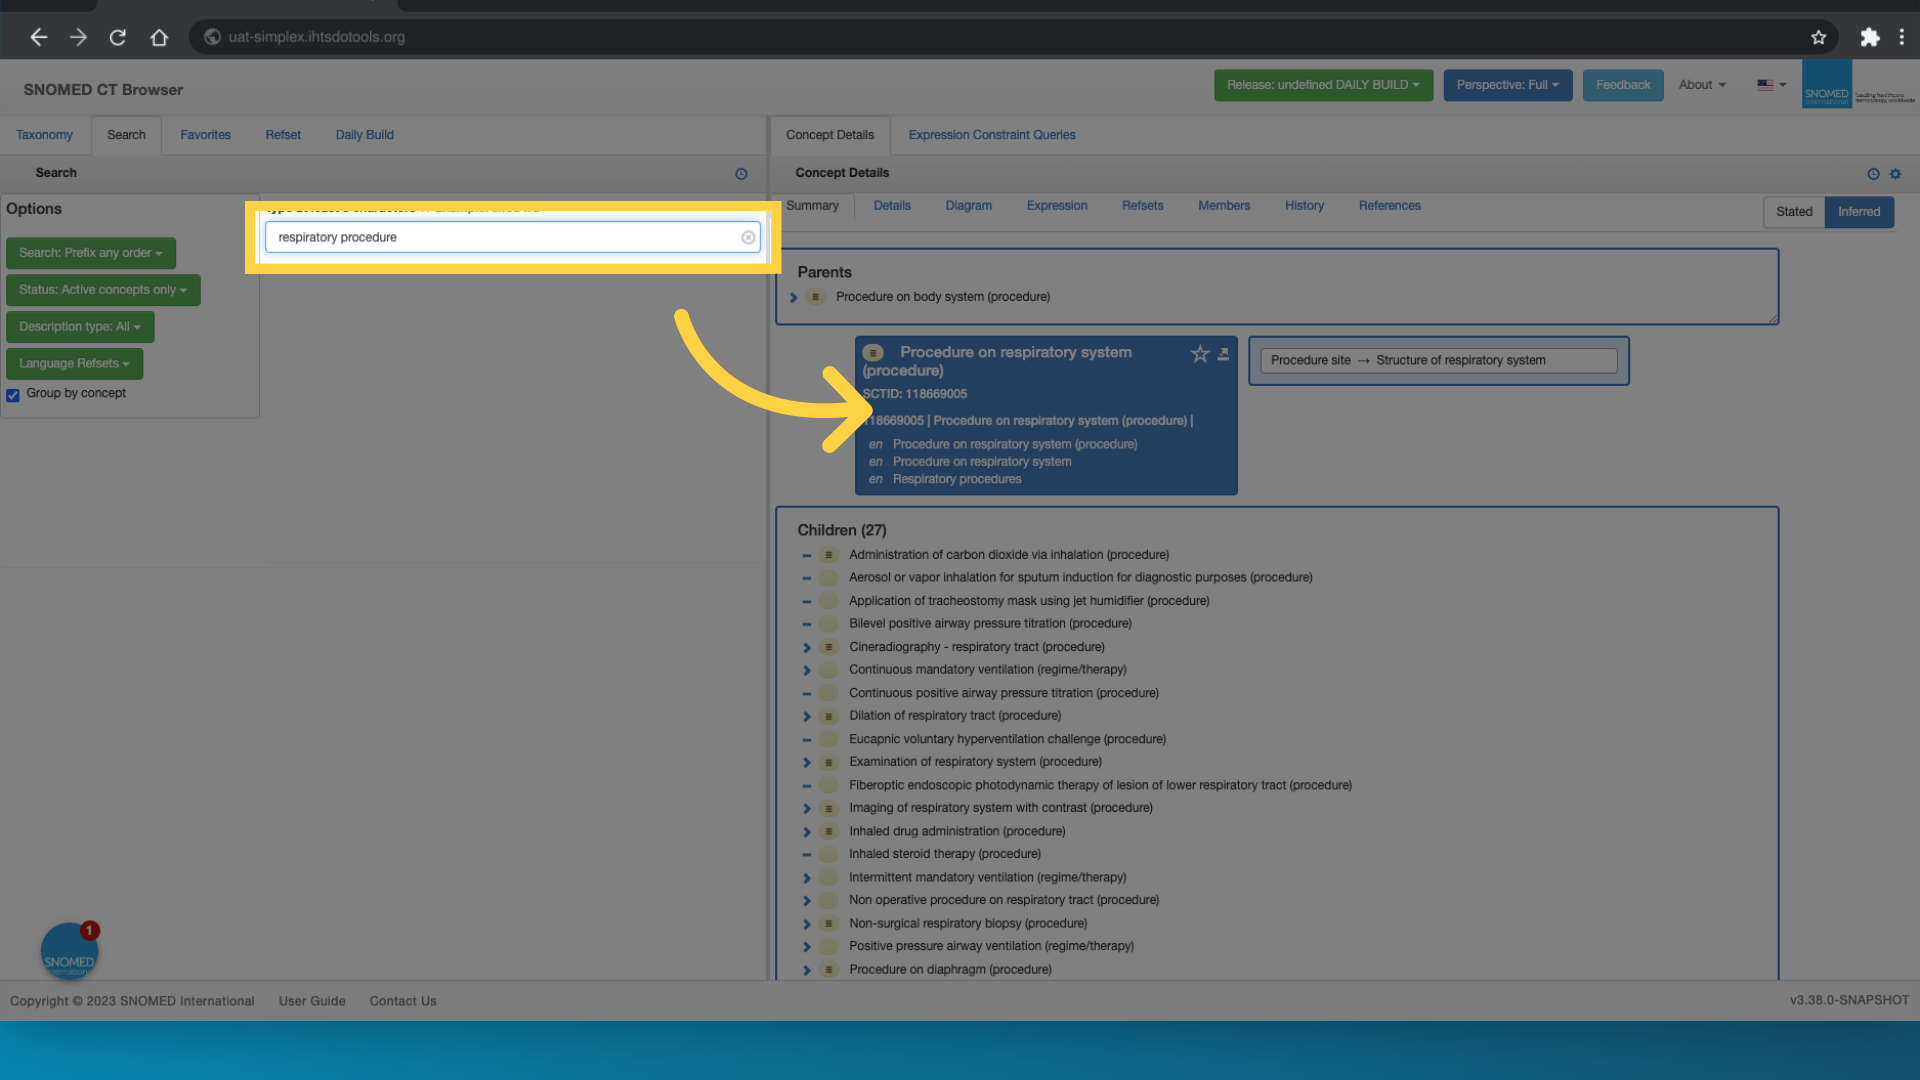
6. Search to find appropriate parent concept
In the browser, do a search for the concept that should be the parent of your extension concept. In this example, I want to create a concept representing a local procedure on the respiratory system. So, the parent I want is the concept procedure on respiratory system.
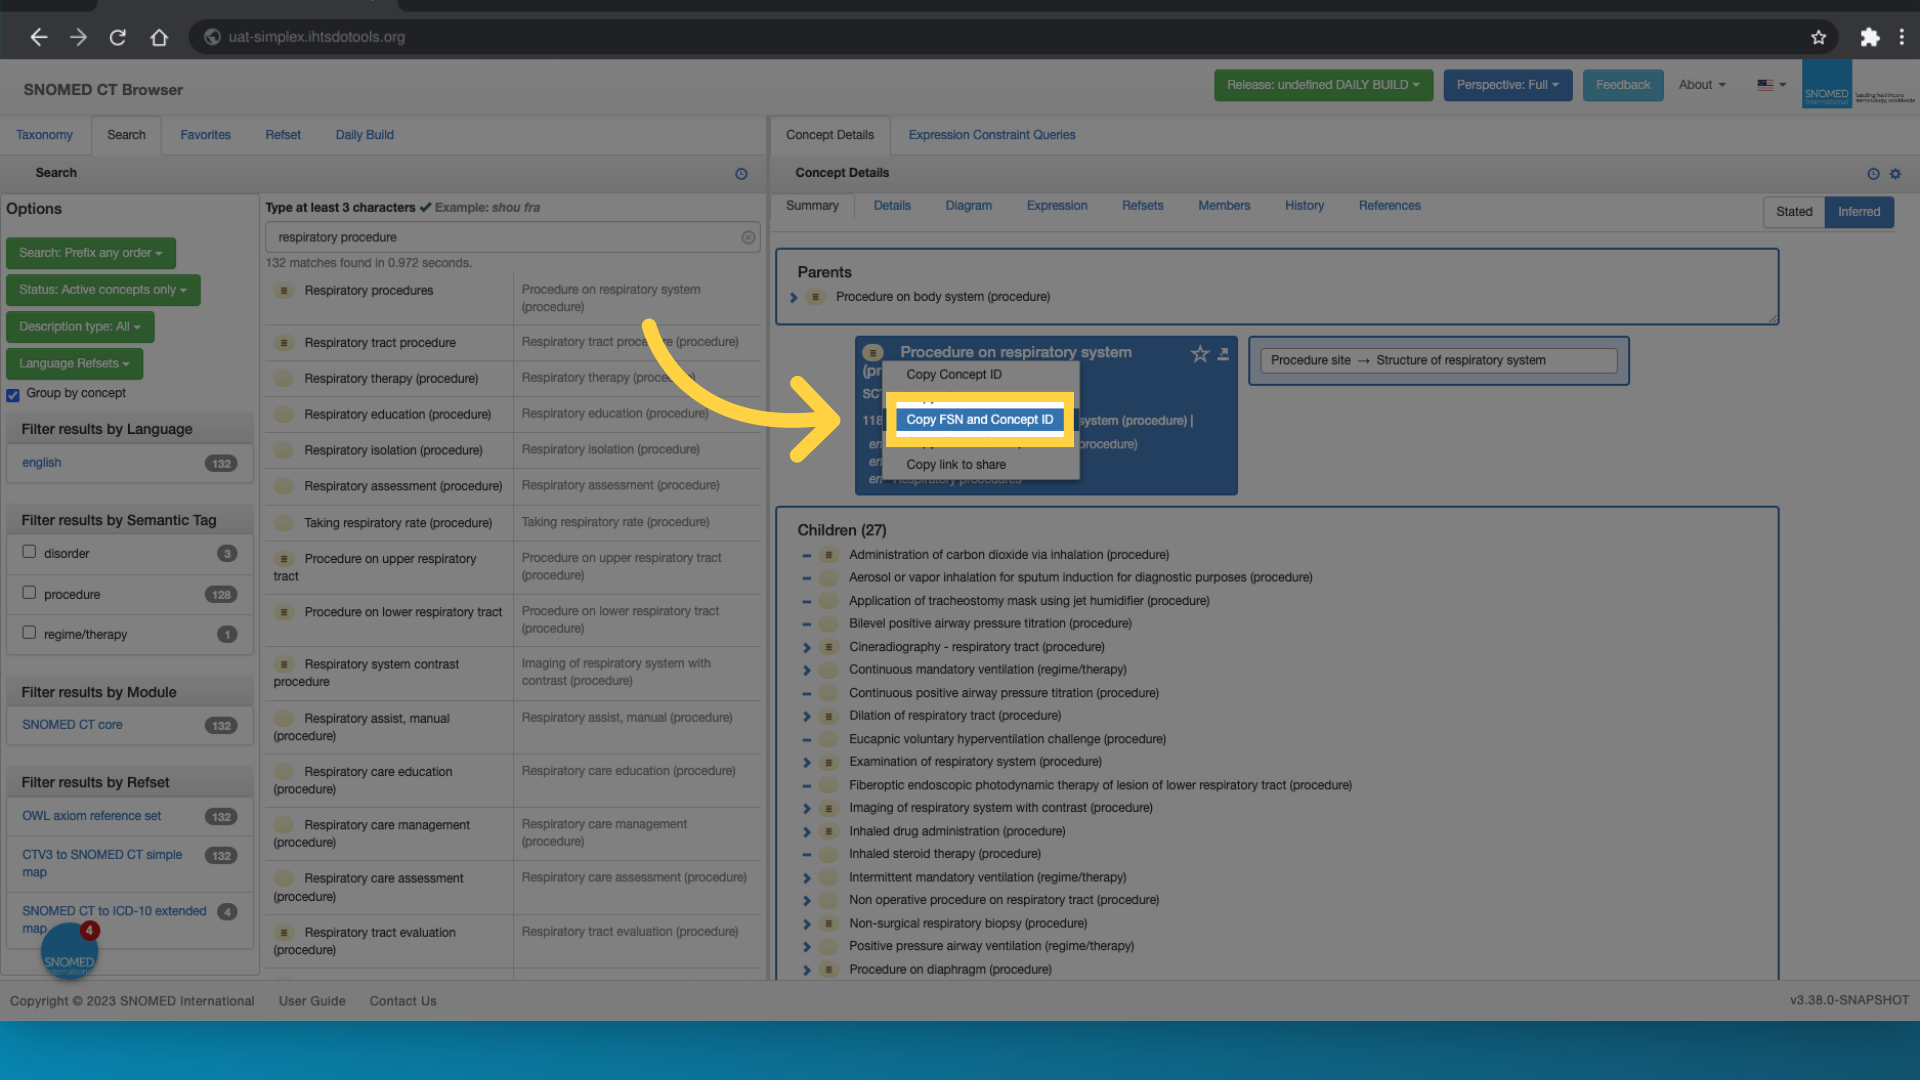
7. Click "Copy FSN and Concept ID"
Once you've identified the appropriate parent concept for your new extension concept, copy the conceptId and a term for the parent concept.
8. Open spreadsheet
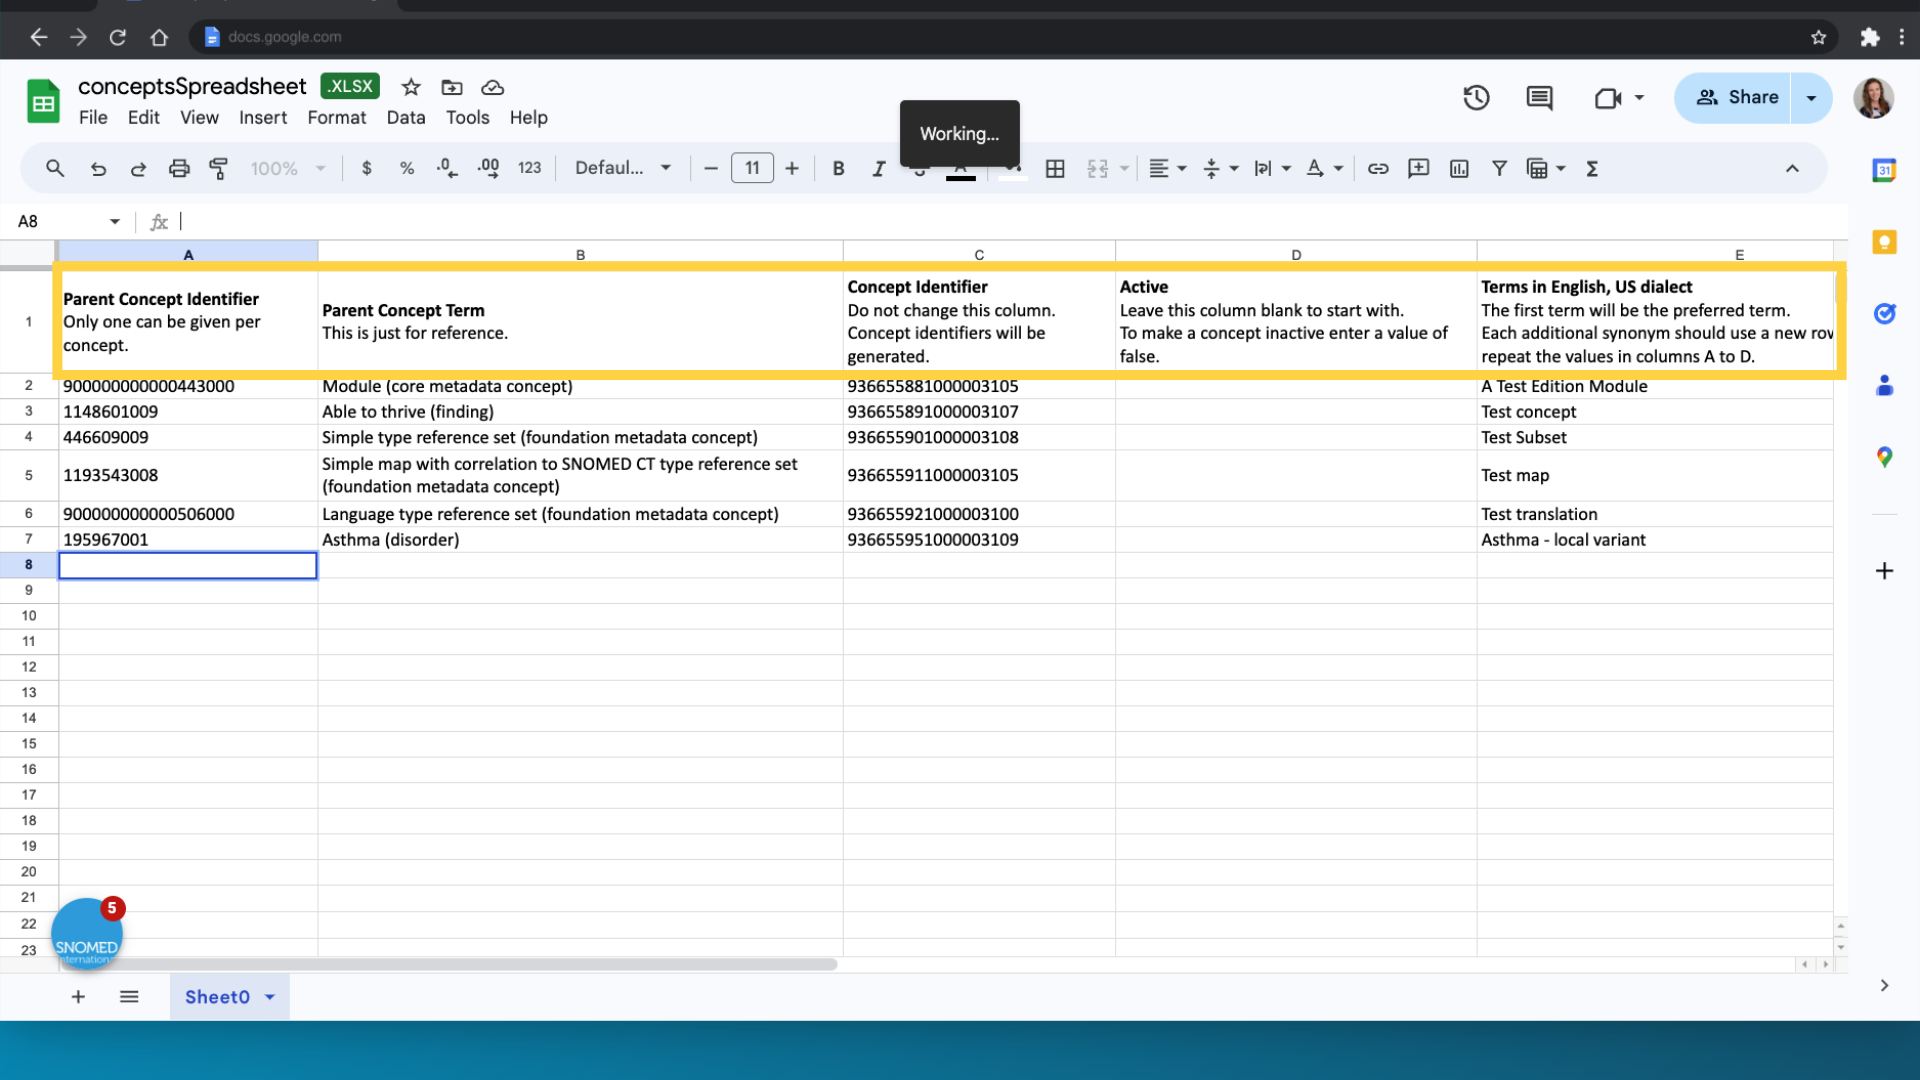
Now, open the spreadsheet with the extension concepts you downloaded earlier in your preferred spreadsheet editor. Bear in mind that you should be able to save the spreadsheet in Excel format after editing.
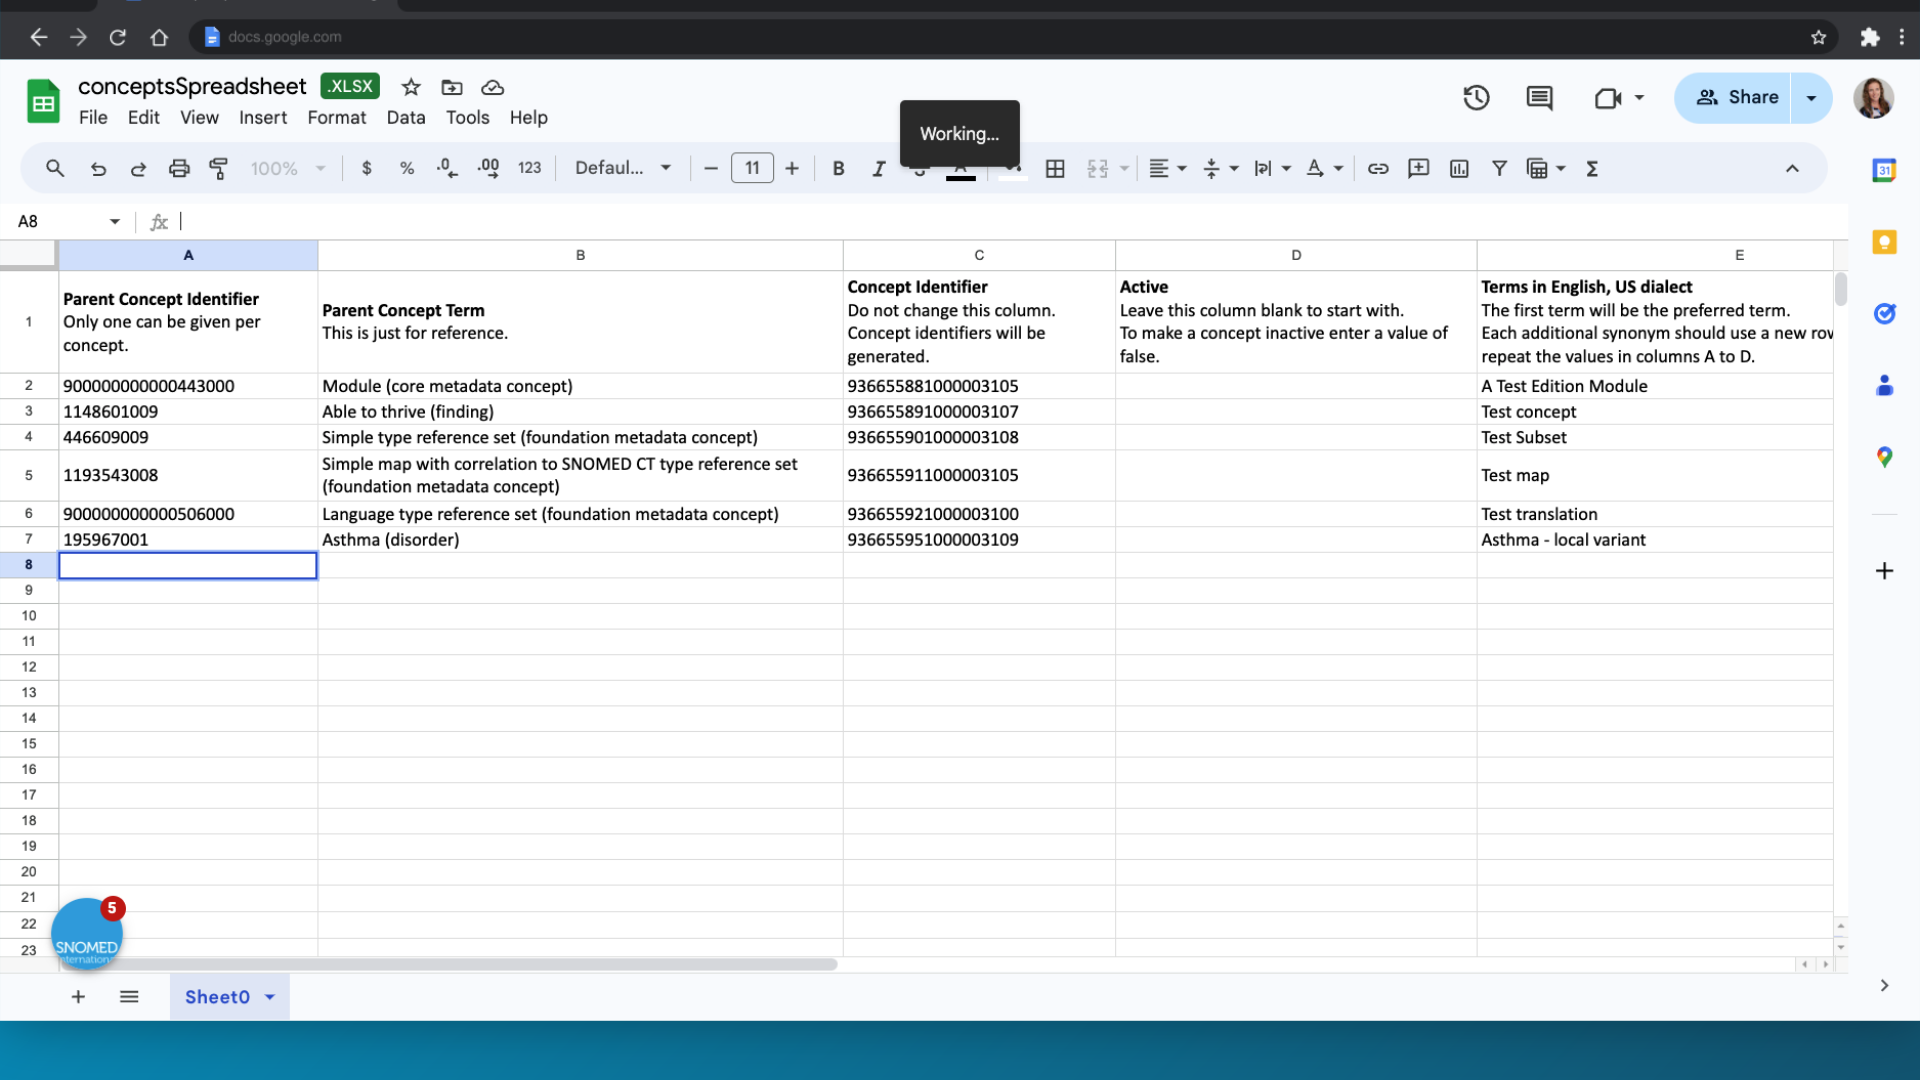
9. View the structure of the spreadsheet
This is the spreadsheet in which you apply all the information required to create your extension concepts. The first row includes some instructions helping you to add the necessary information correctly. Notice how the first two columns include the concept identifier and the terms for the parent concepts.
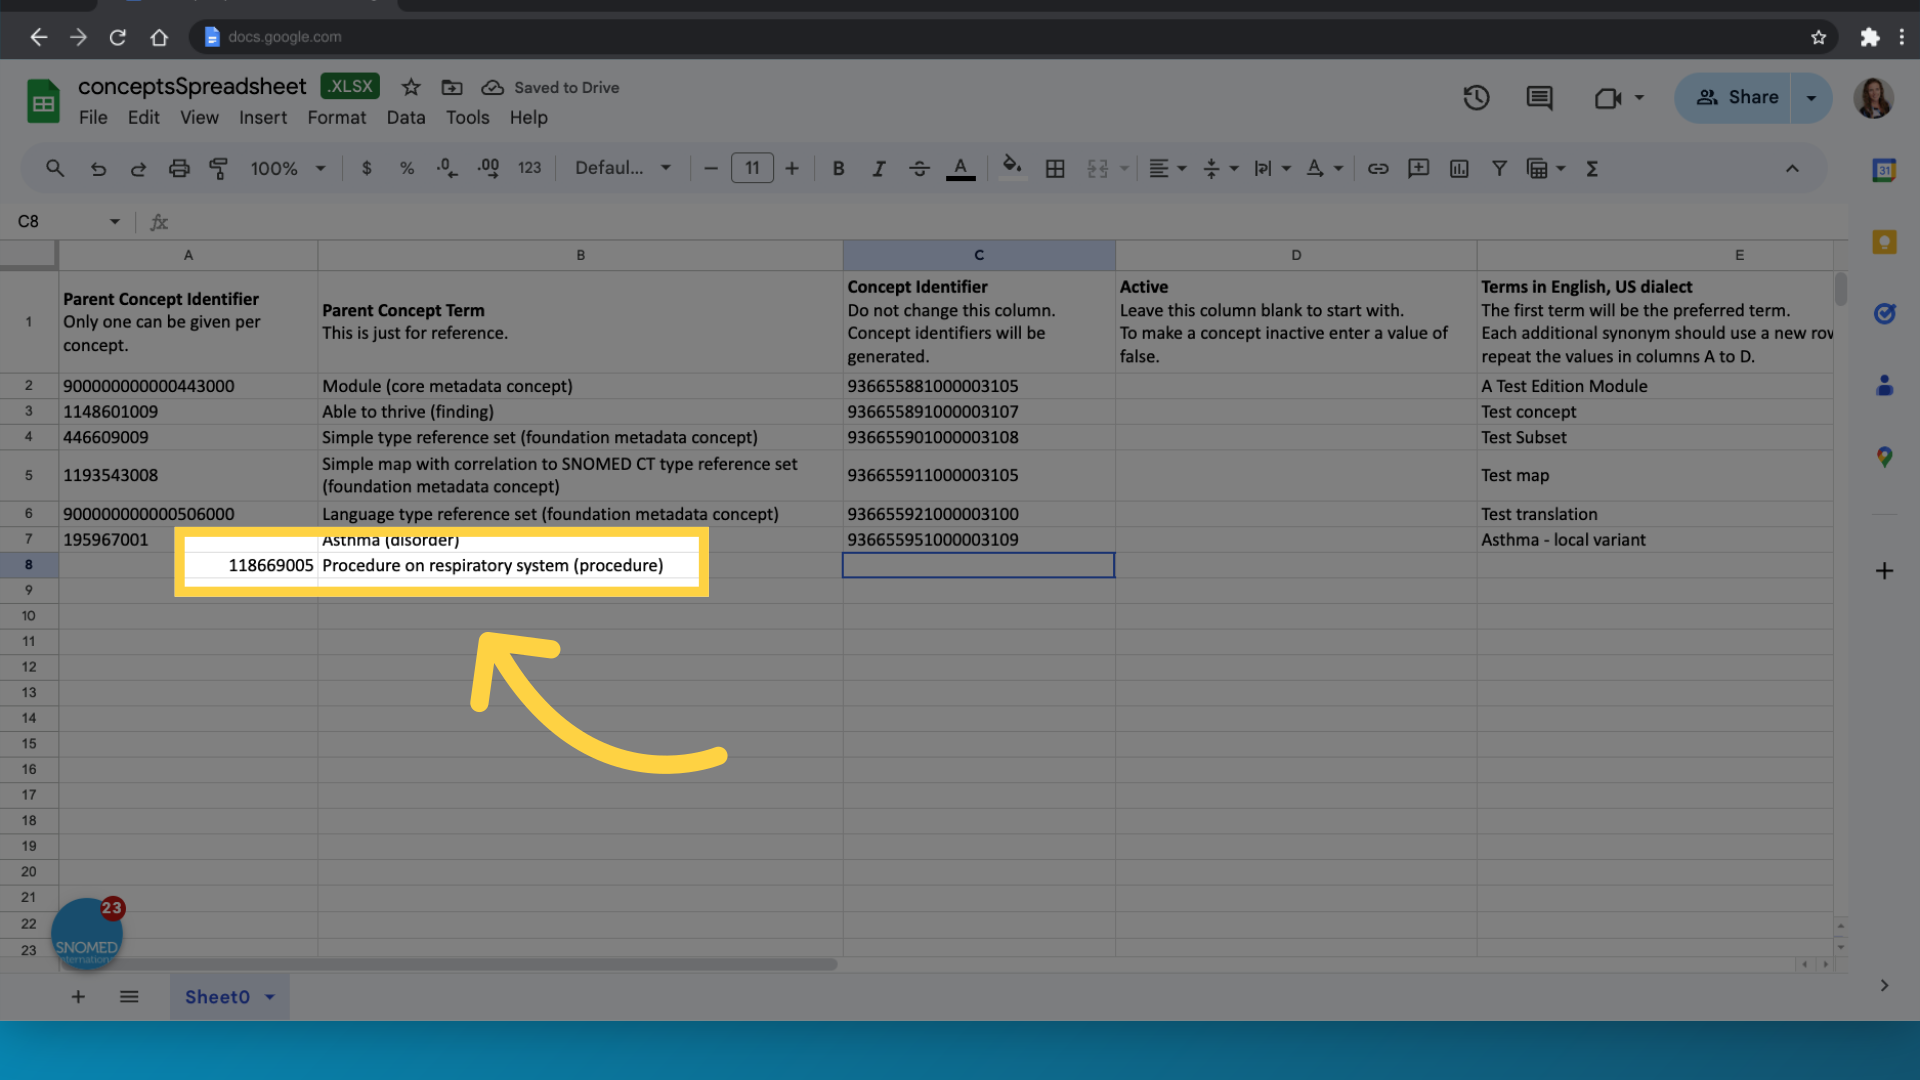
10. Enter ConeptId and term for the parent concept
In the first column, enter the conceptId for the parent concept, and in the second column, add the term for the parent concept. Notice that each extension concept created in Simplex can only have one parent.
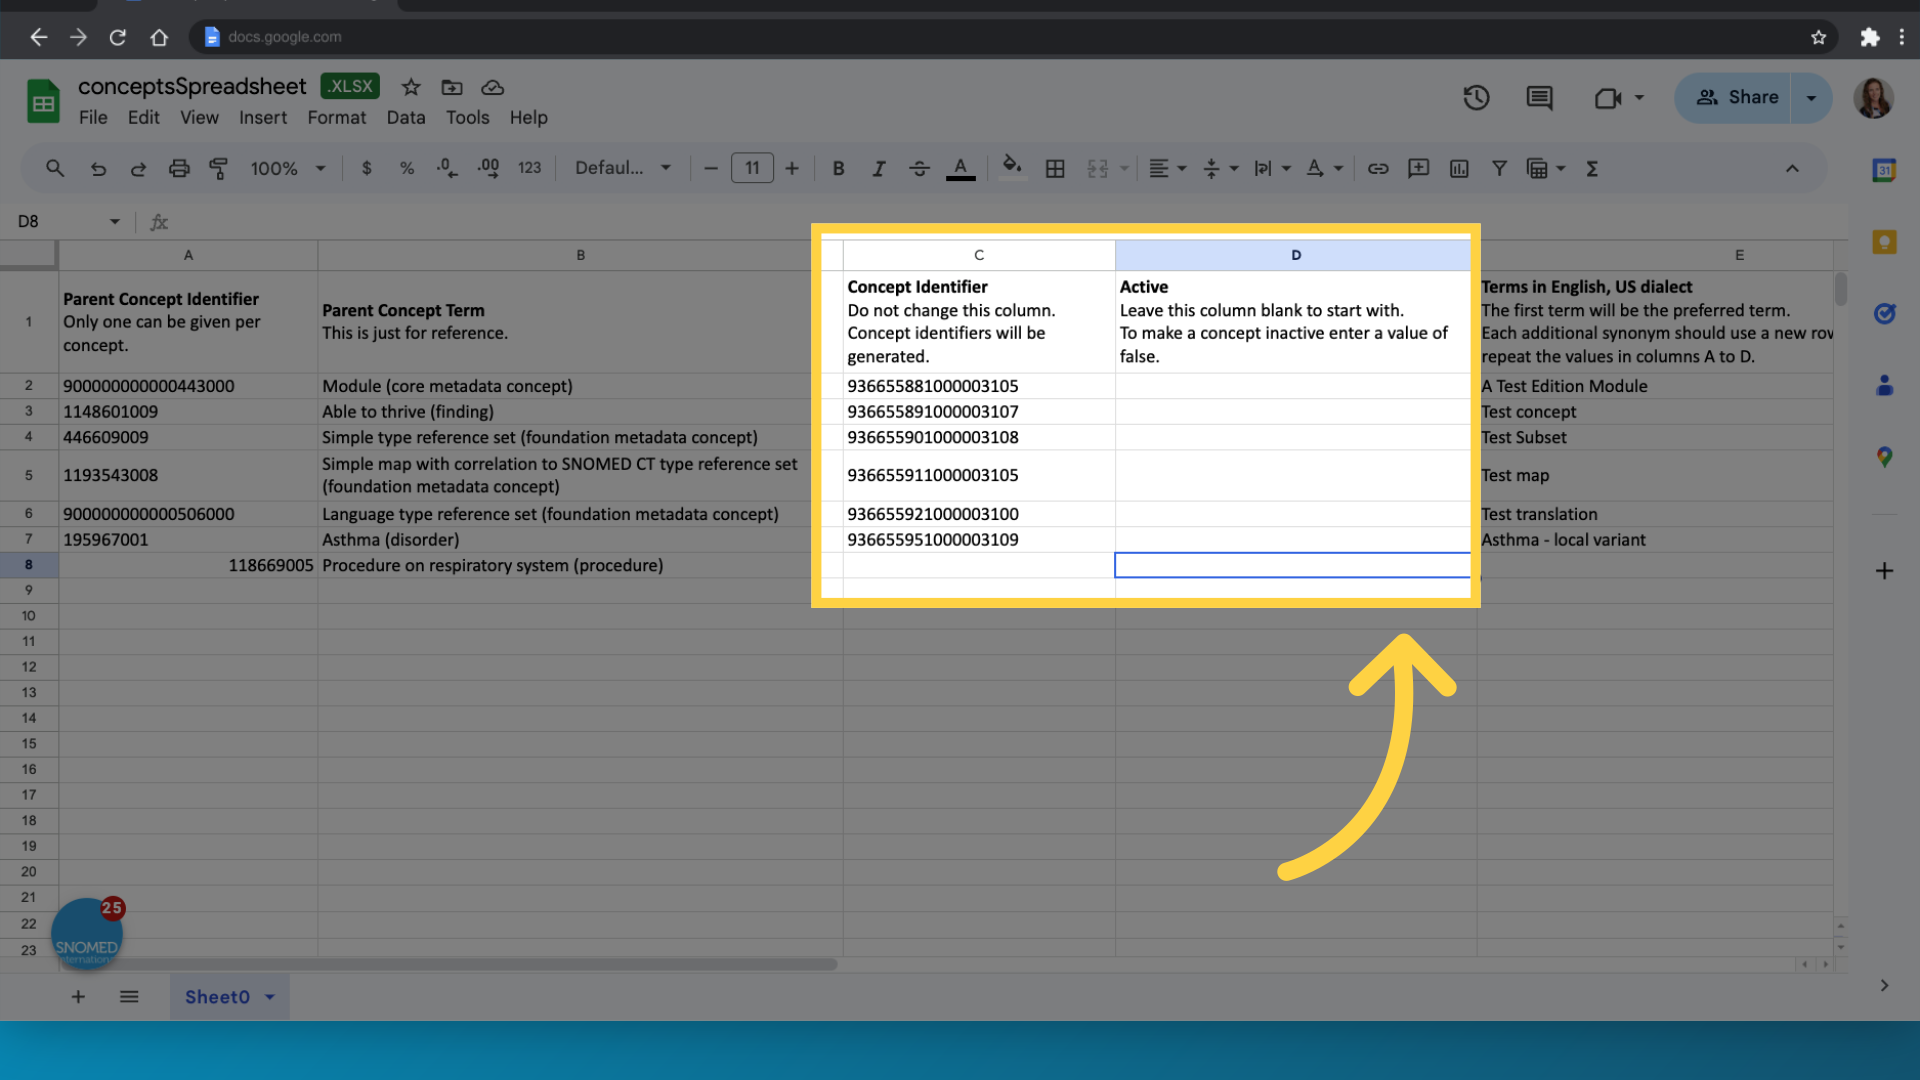
11. Omit column C and D
As you are creating a new concept for your extension, you should ignore columns C and D, which are used to hold the identifier for the concept and the active state. When uploading the spreadsheet into Simplex, it will generate an identifier for your concept and assign it the status of active.
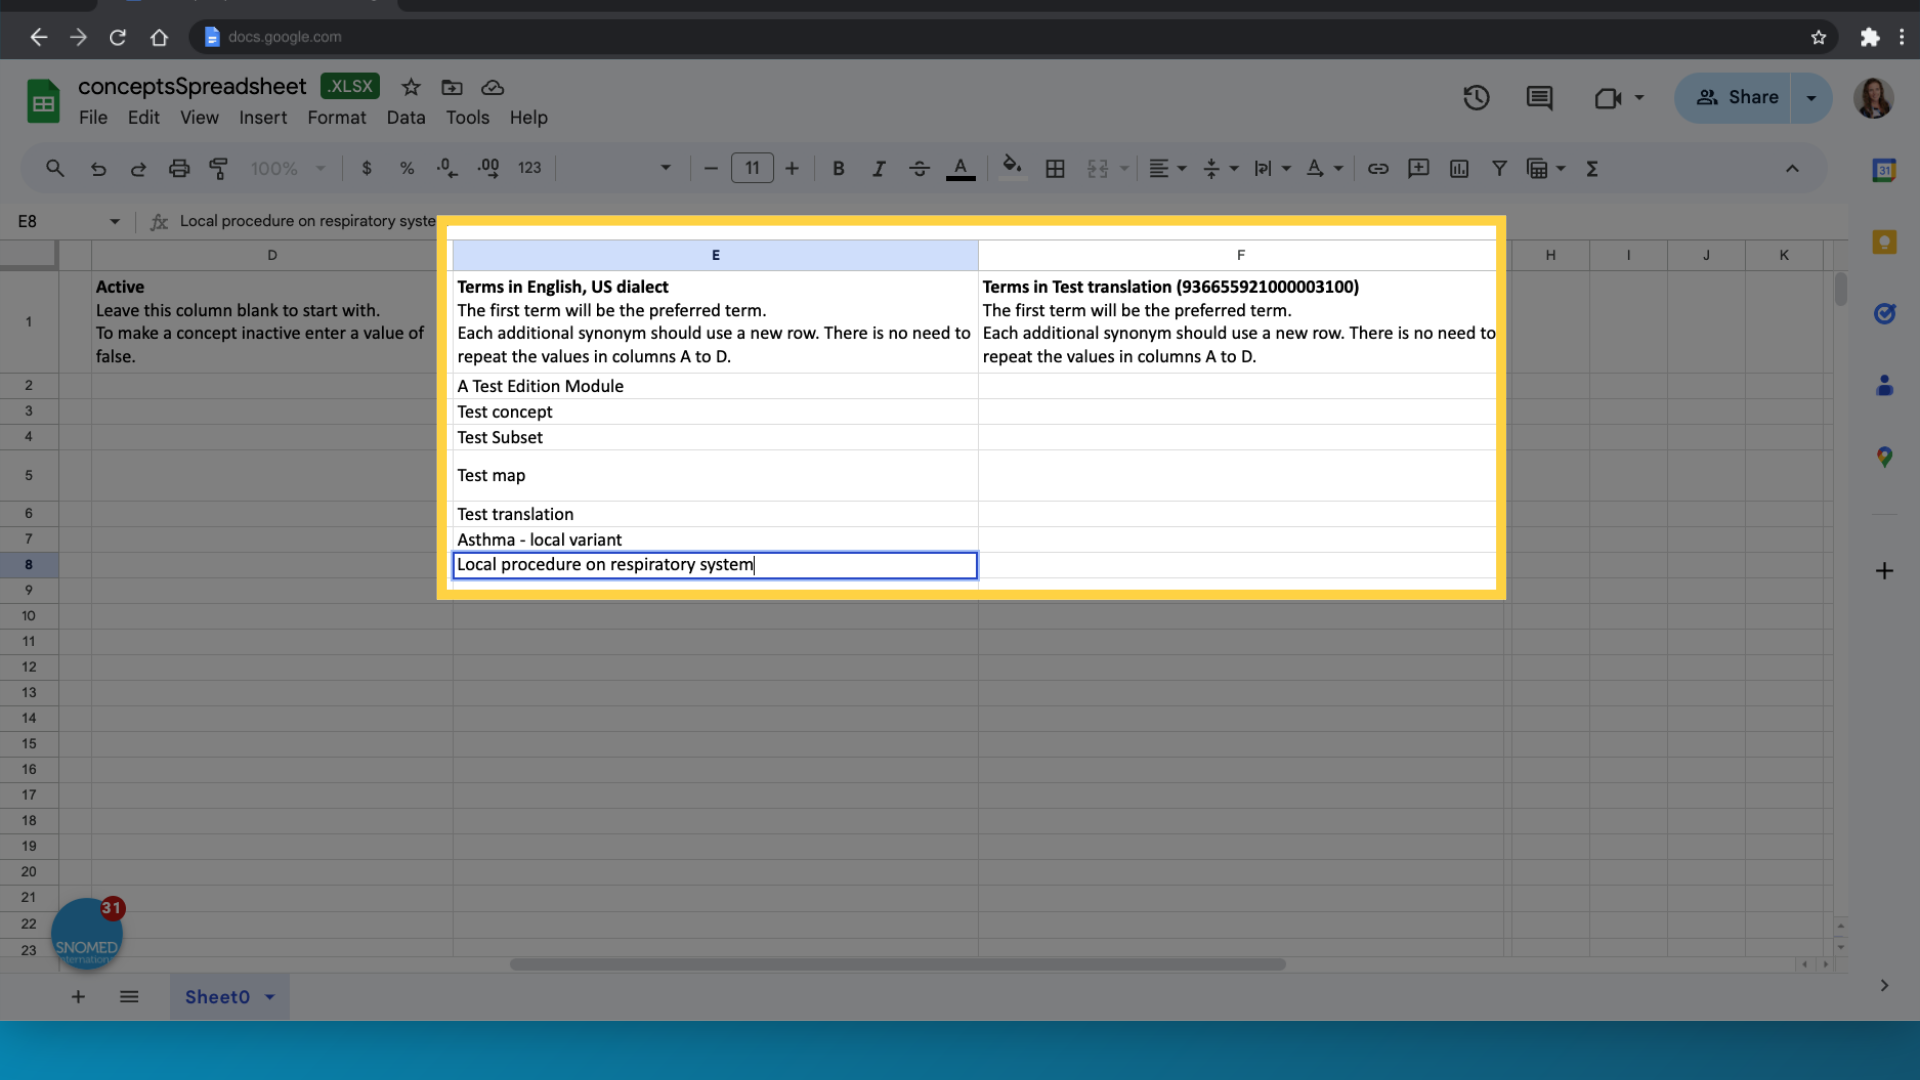
12. Navigate to column E and F
Having provided the details about the parent concept, navigate to column E and F to apply the terms for the new extension concept. Column E is for terms in English and the US-English dialect. Column F is for terms in your local language or dialect.
13. Enter the preferred term
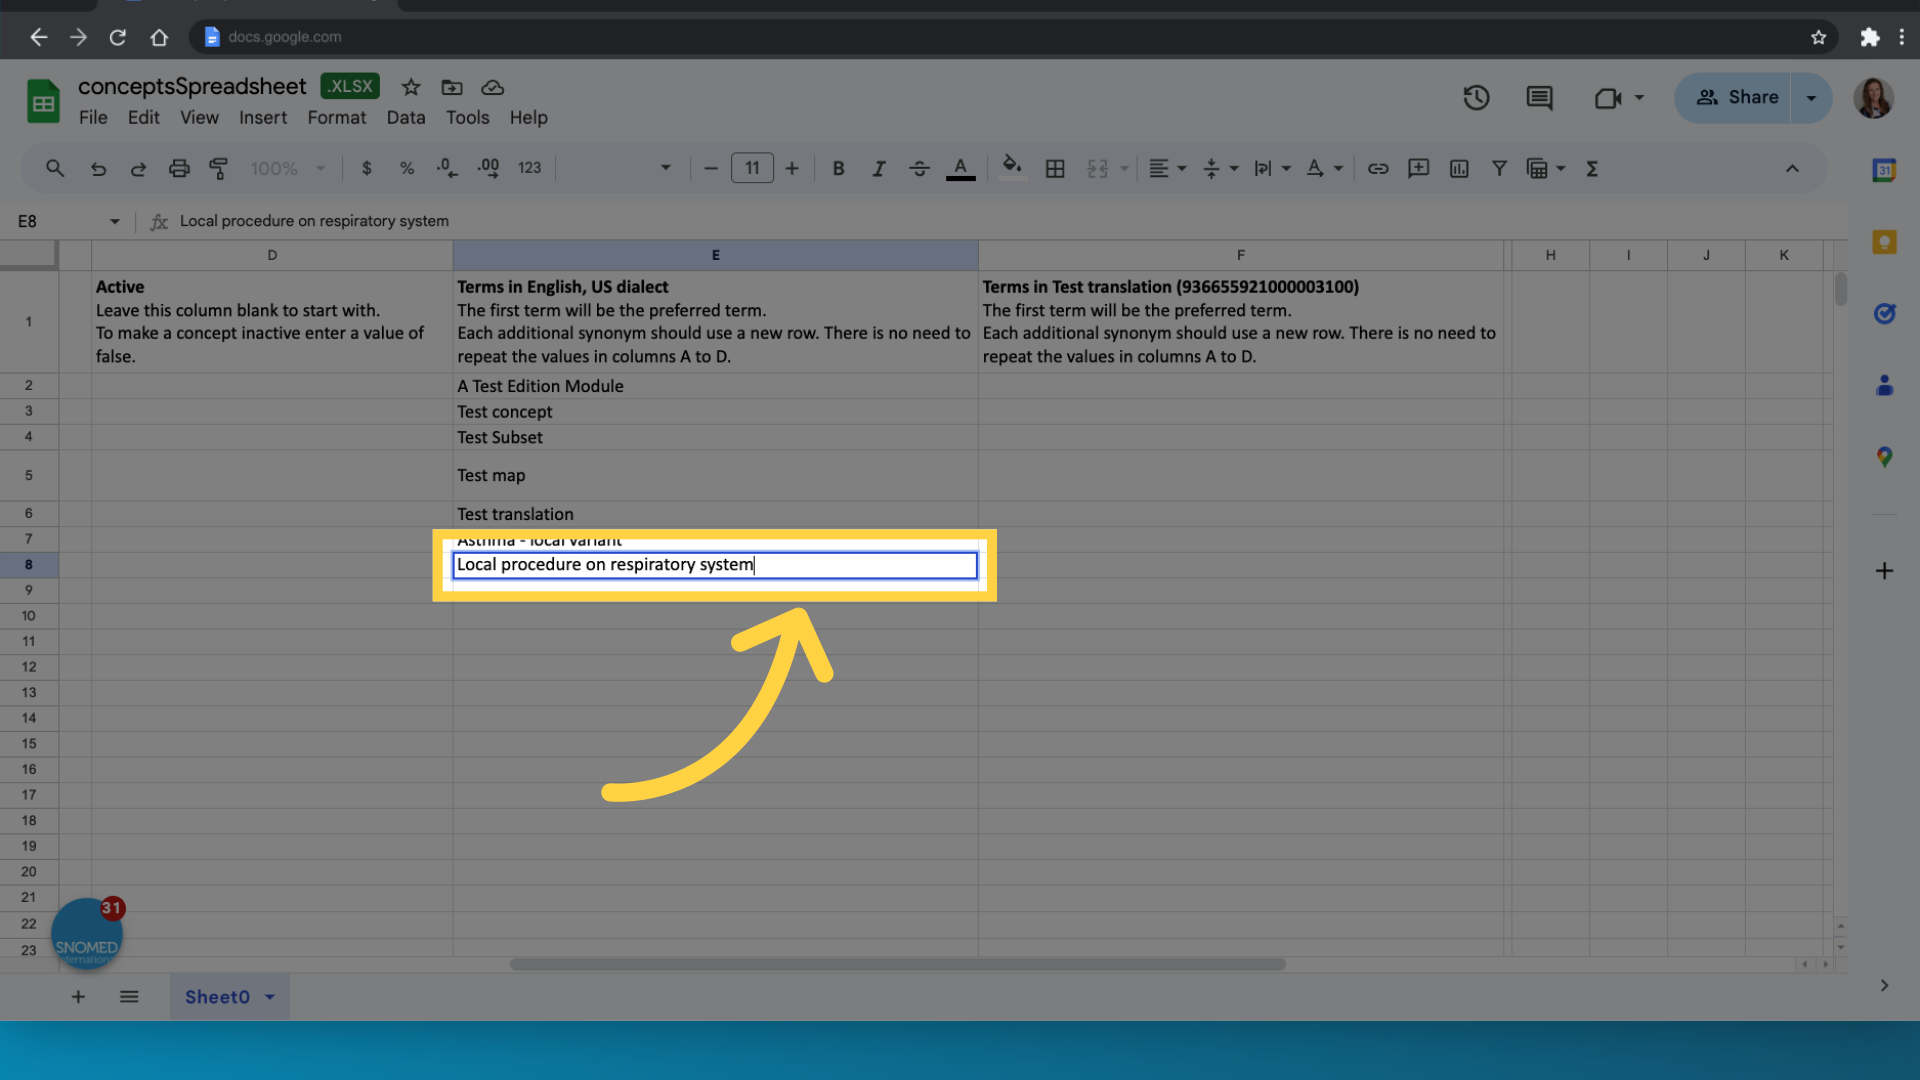
In this example, I am only going to create terms in English. In the same row as the details for the parent concept, I enter the term that is going to be the preferred term
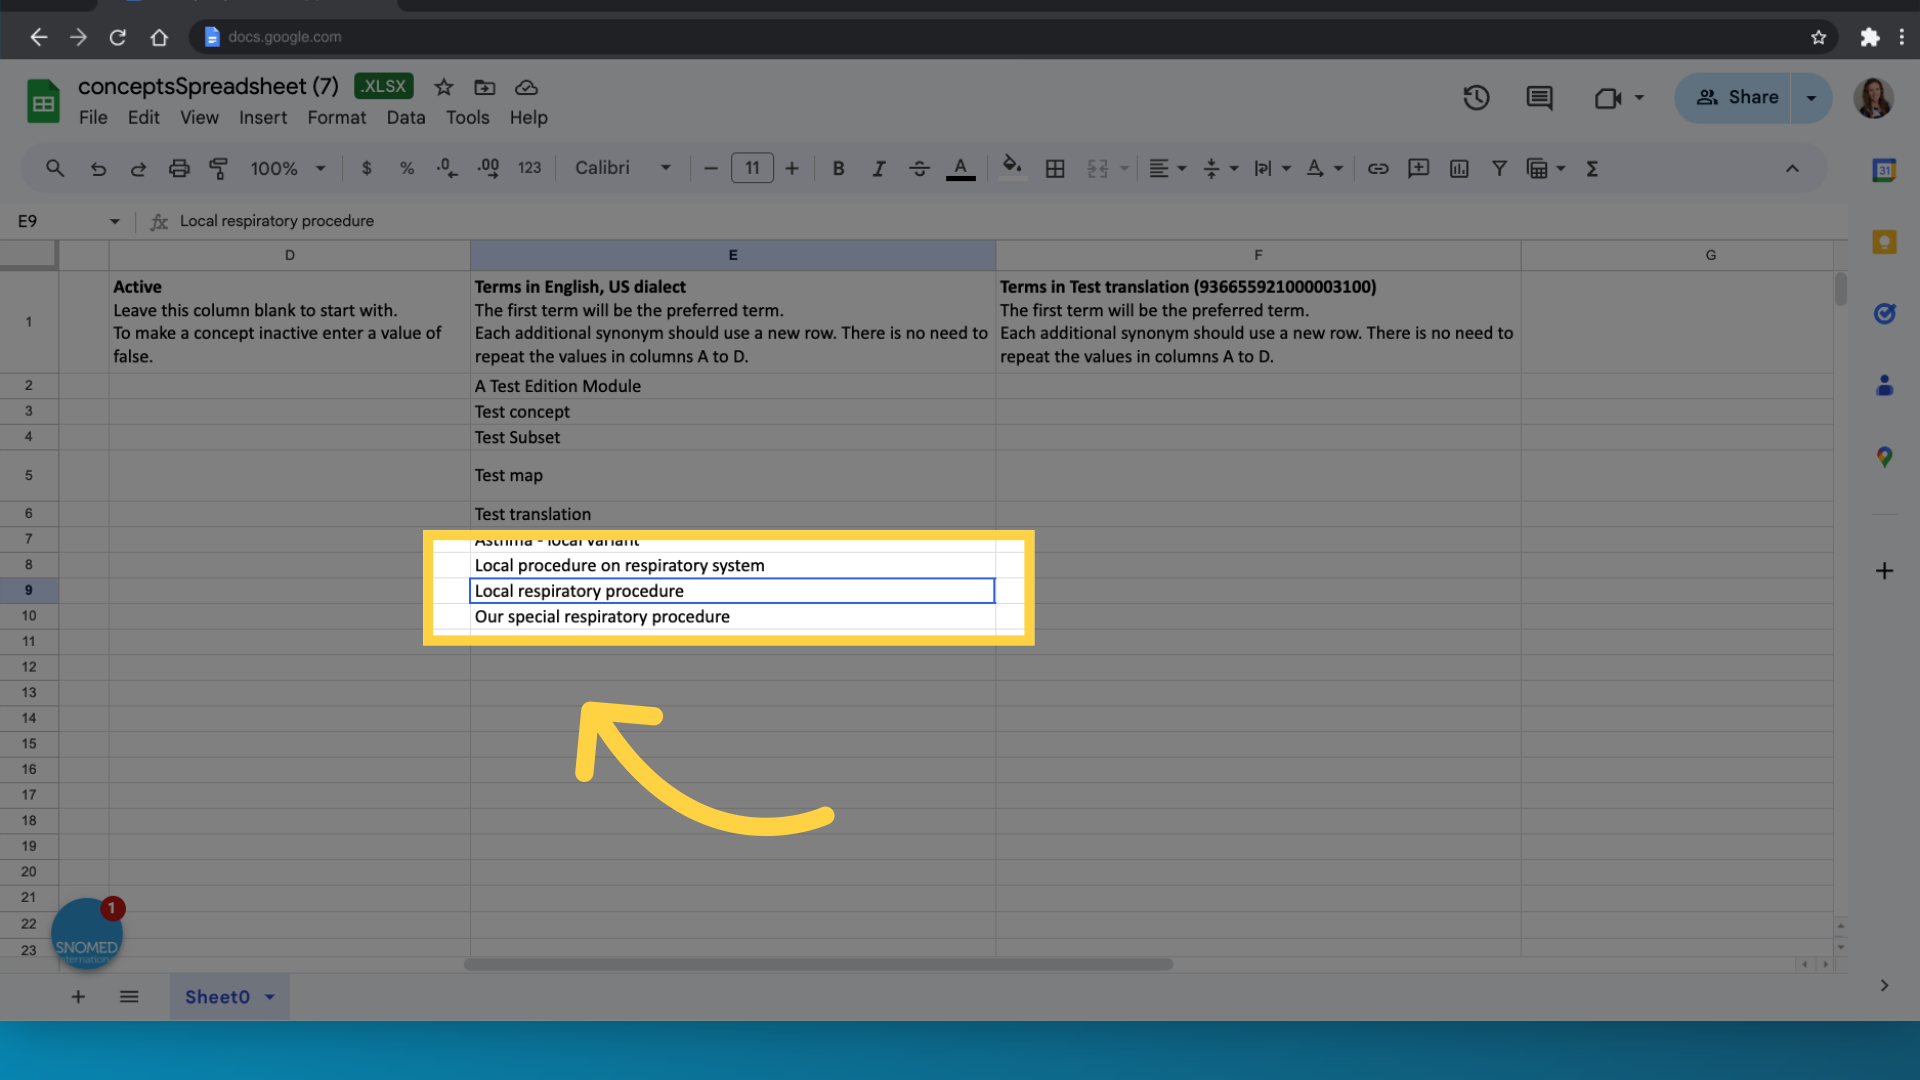
14. Add synonyms
In the subsequent rows, you can add the synonyms you want for your concept. Please note that you don't need to add any values in column A to D
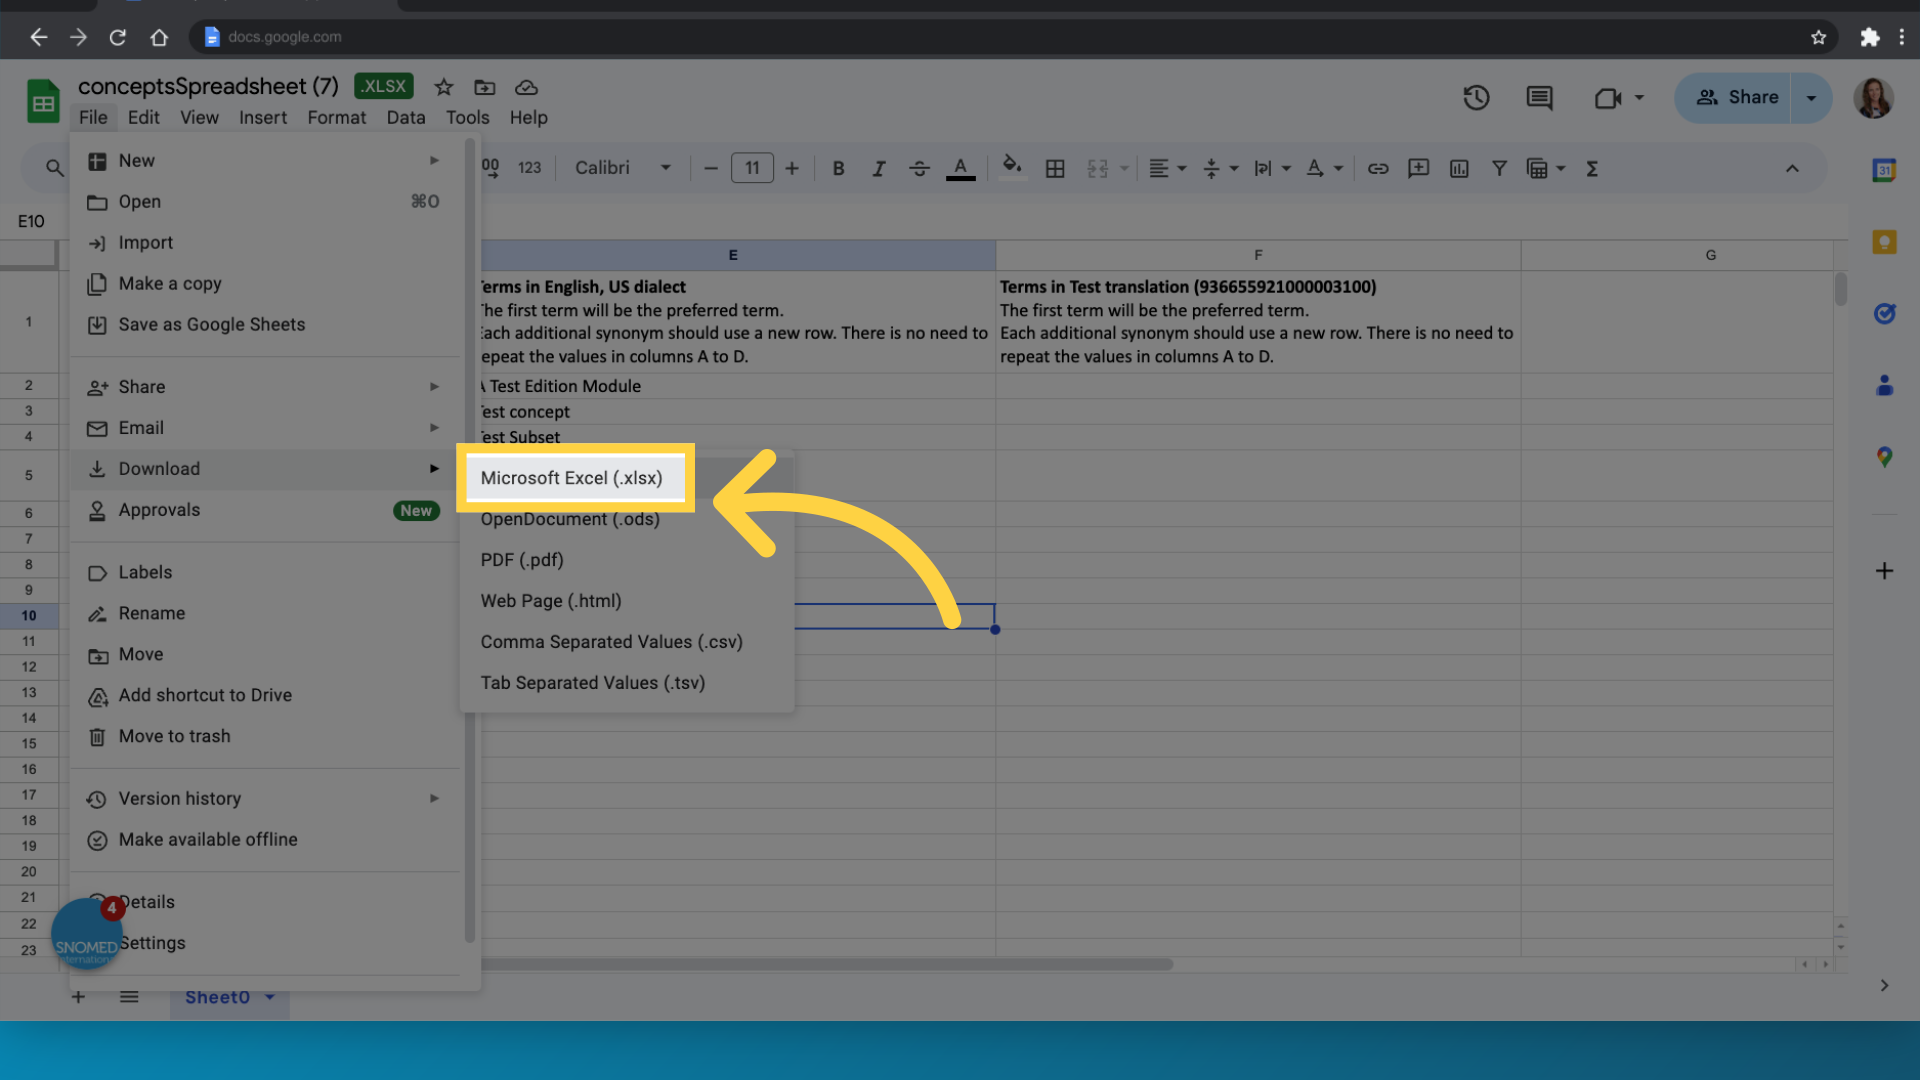
15. Save and download spreadsheet
Once you have created your concepts and the related terms, you should save and download the spreadsheet in Excel format.
16. Switch to Simplex
Once you have edited the spreadsheet with the details of your extension concepts, navigate back to simplex.
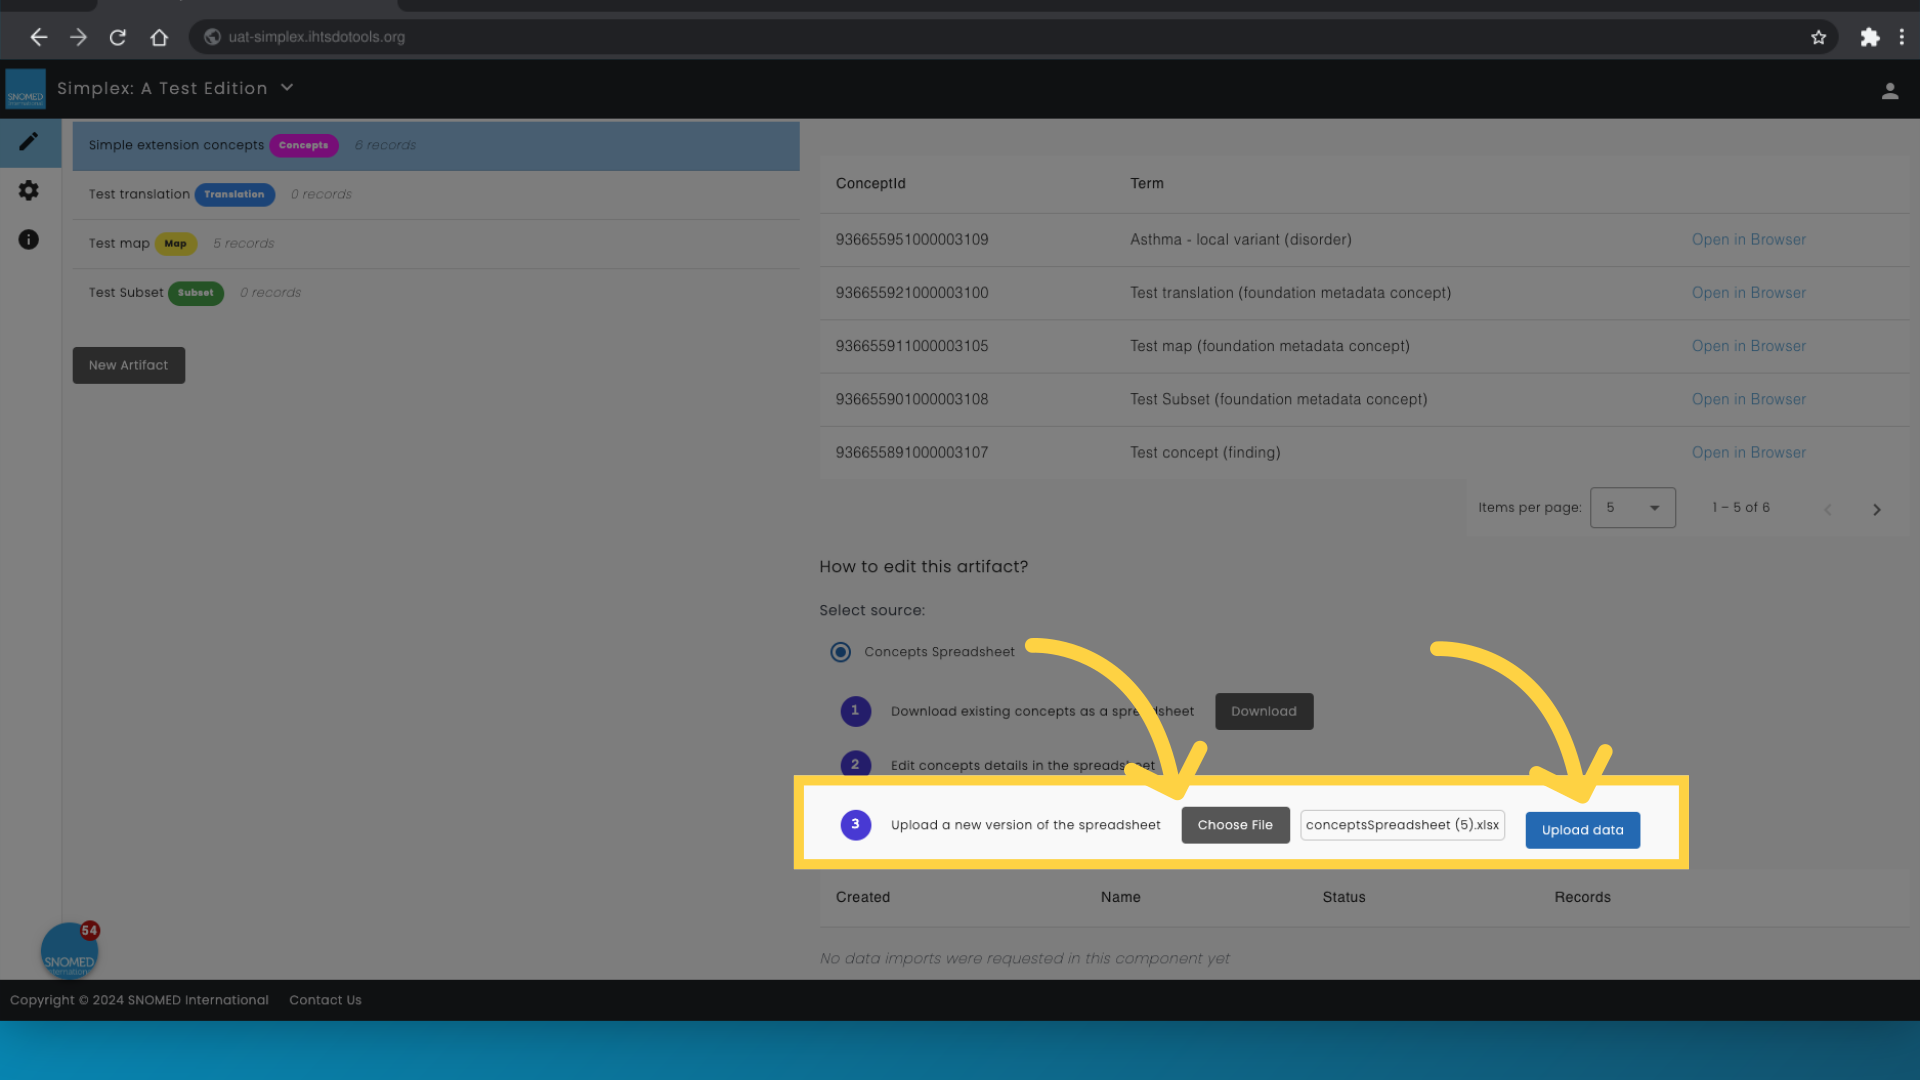
17. Upload spreadsheet
Click the 'choose file' button in step 3 of the process and once the file has been selected, you click the 'upload data' button.
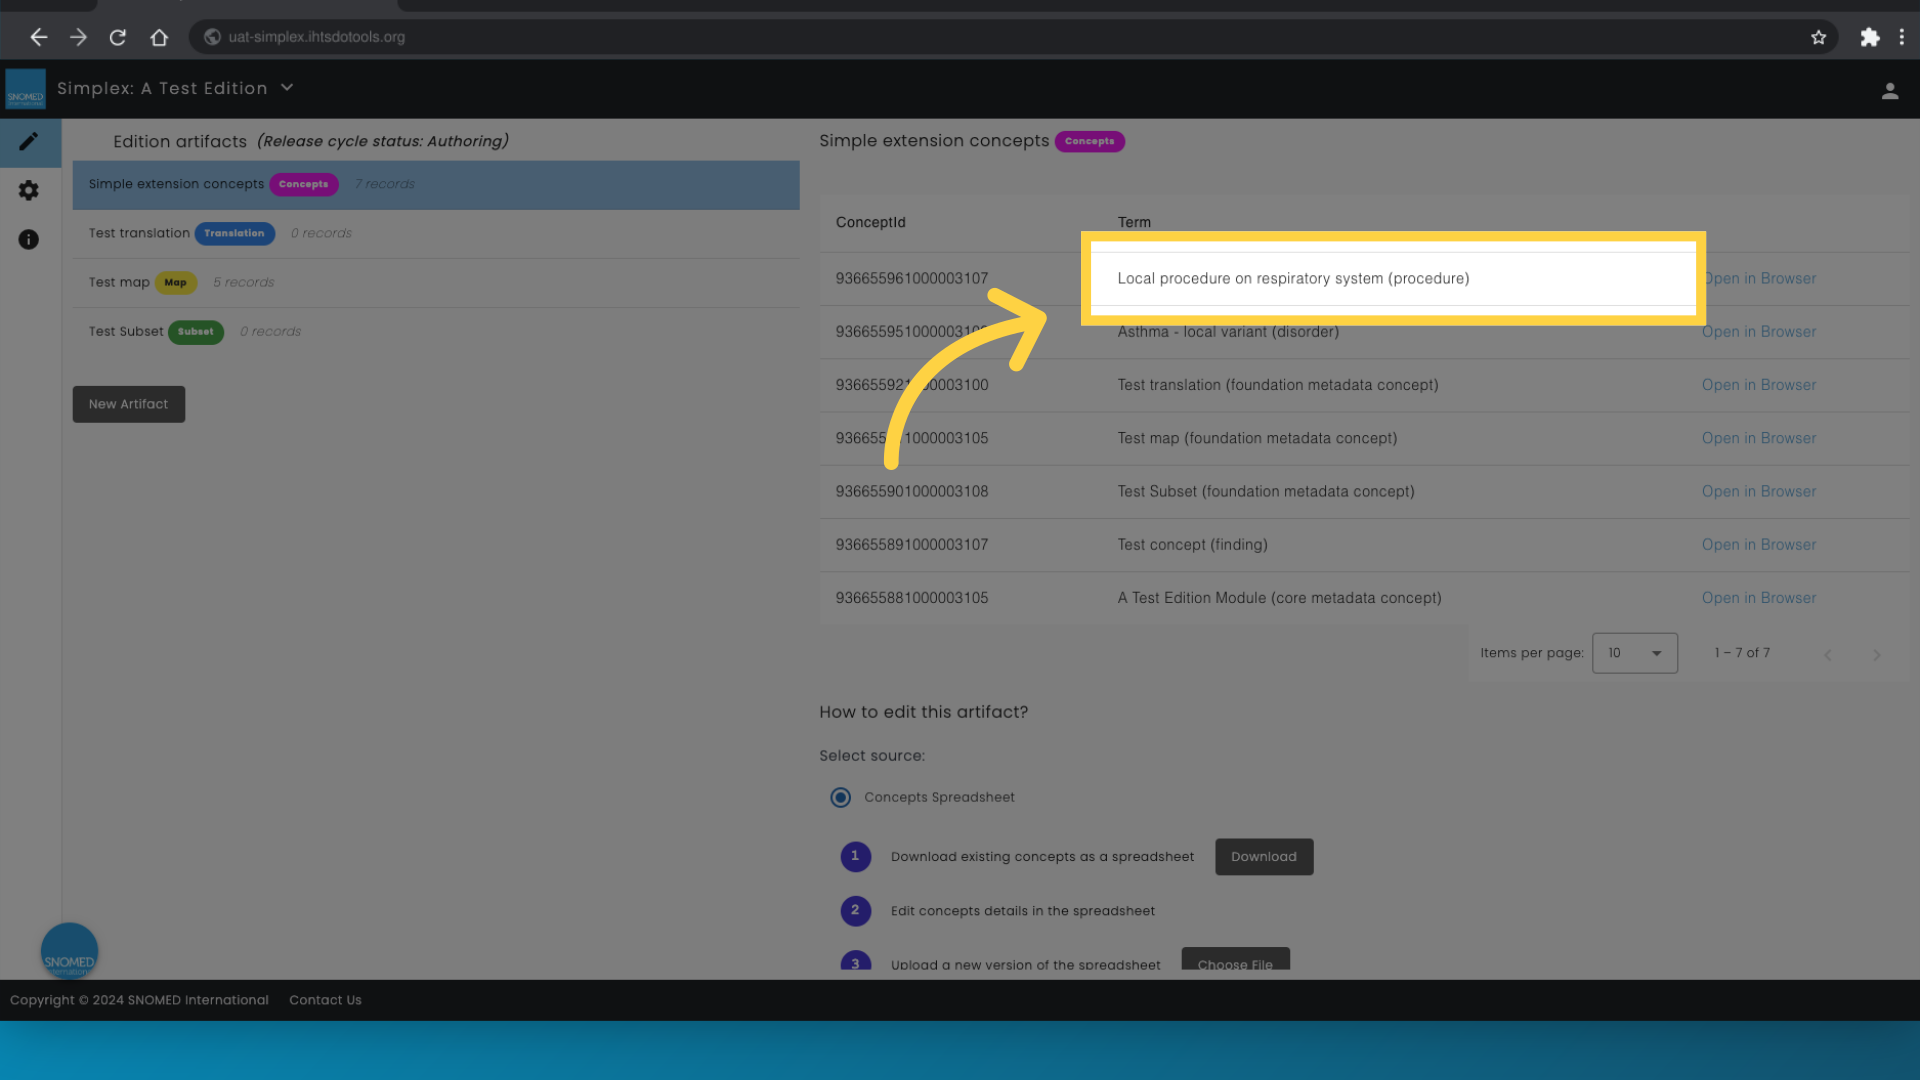
18. View new concept
Once the import has been performed, you can now see the concept in the list of extension concepts. In the case of multiple concepts, you may have to navigate to another page, to see them all.
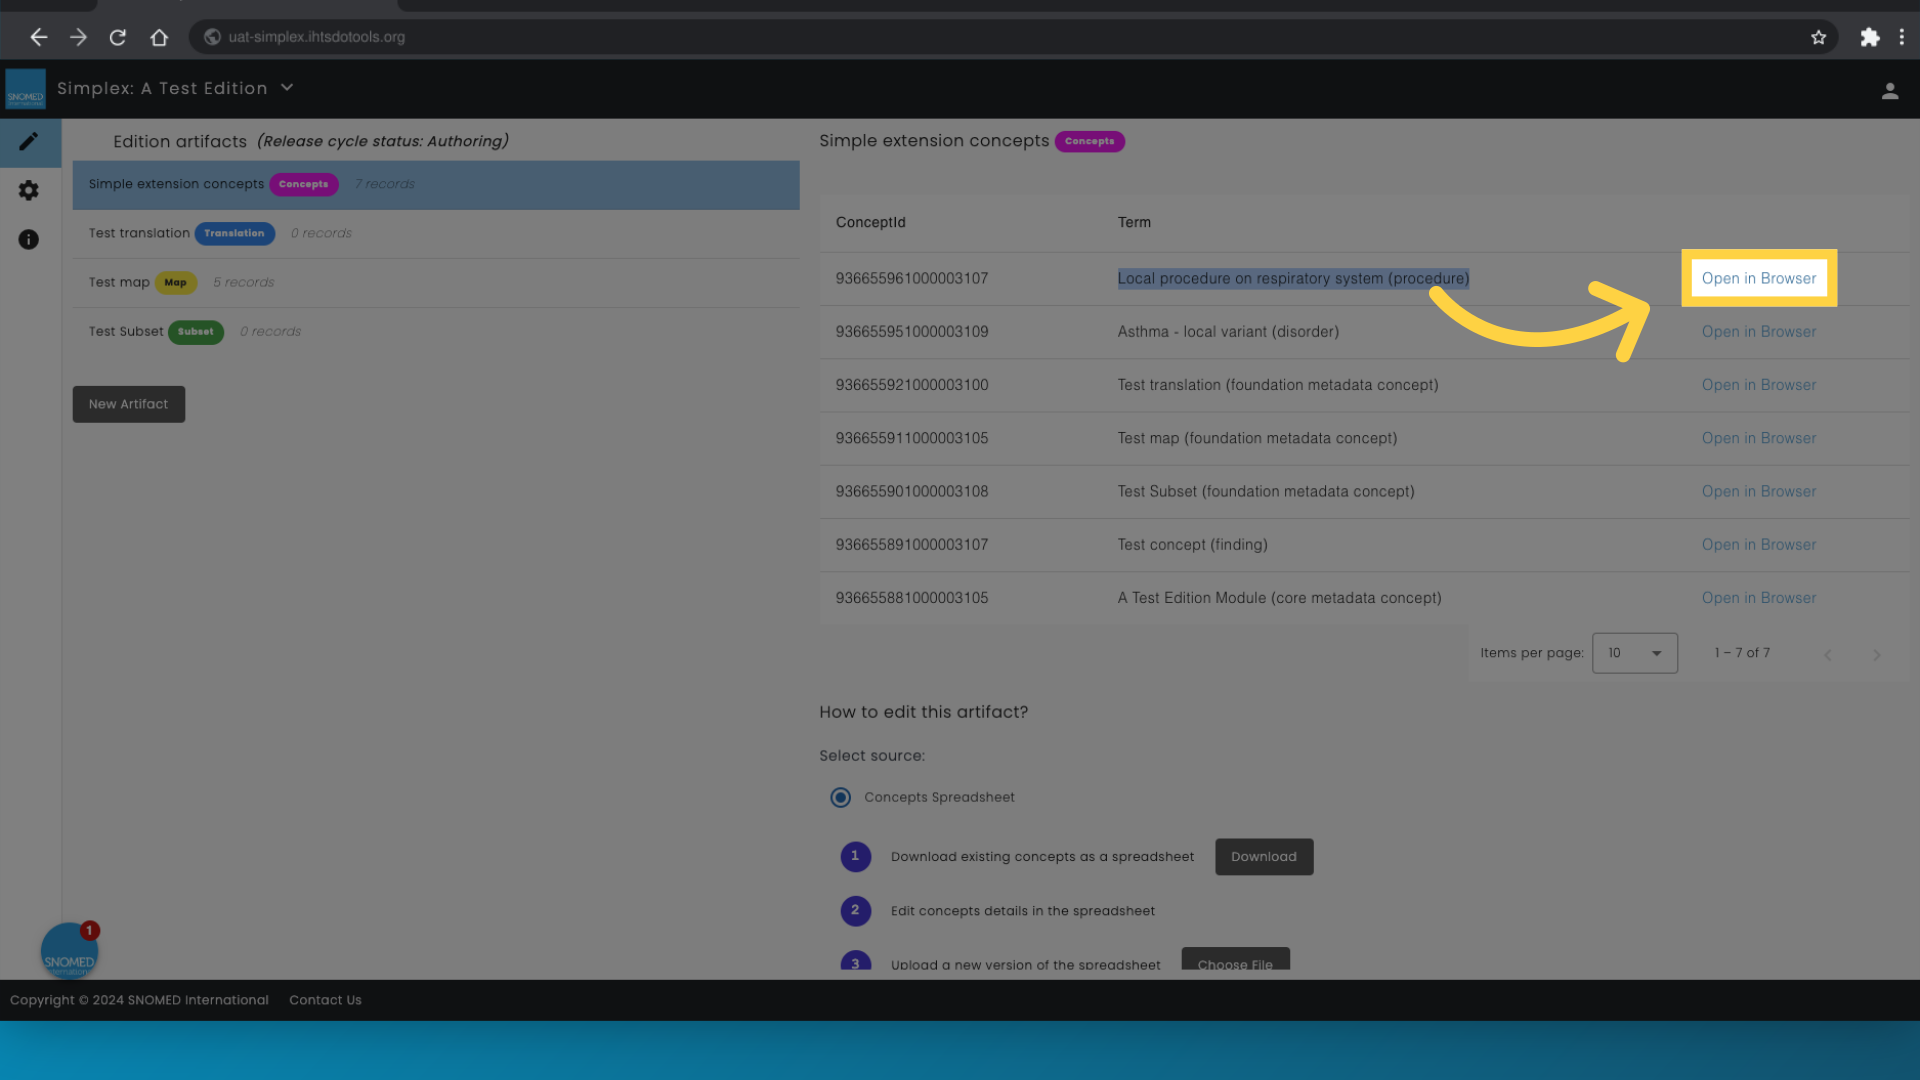
19. Click "Open in Browser"
You can click 'Open in Browser', to view the concept and its associated synonyms.
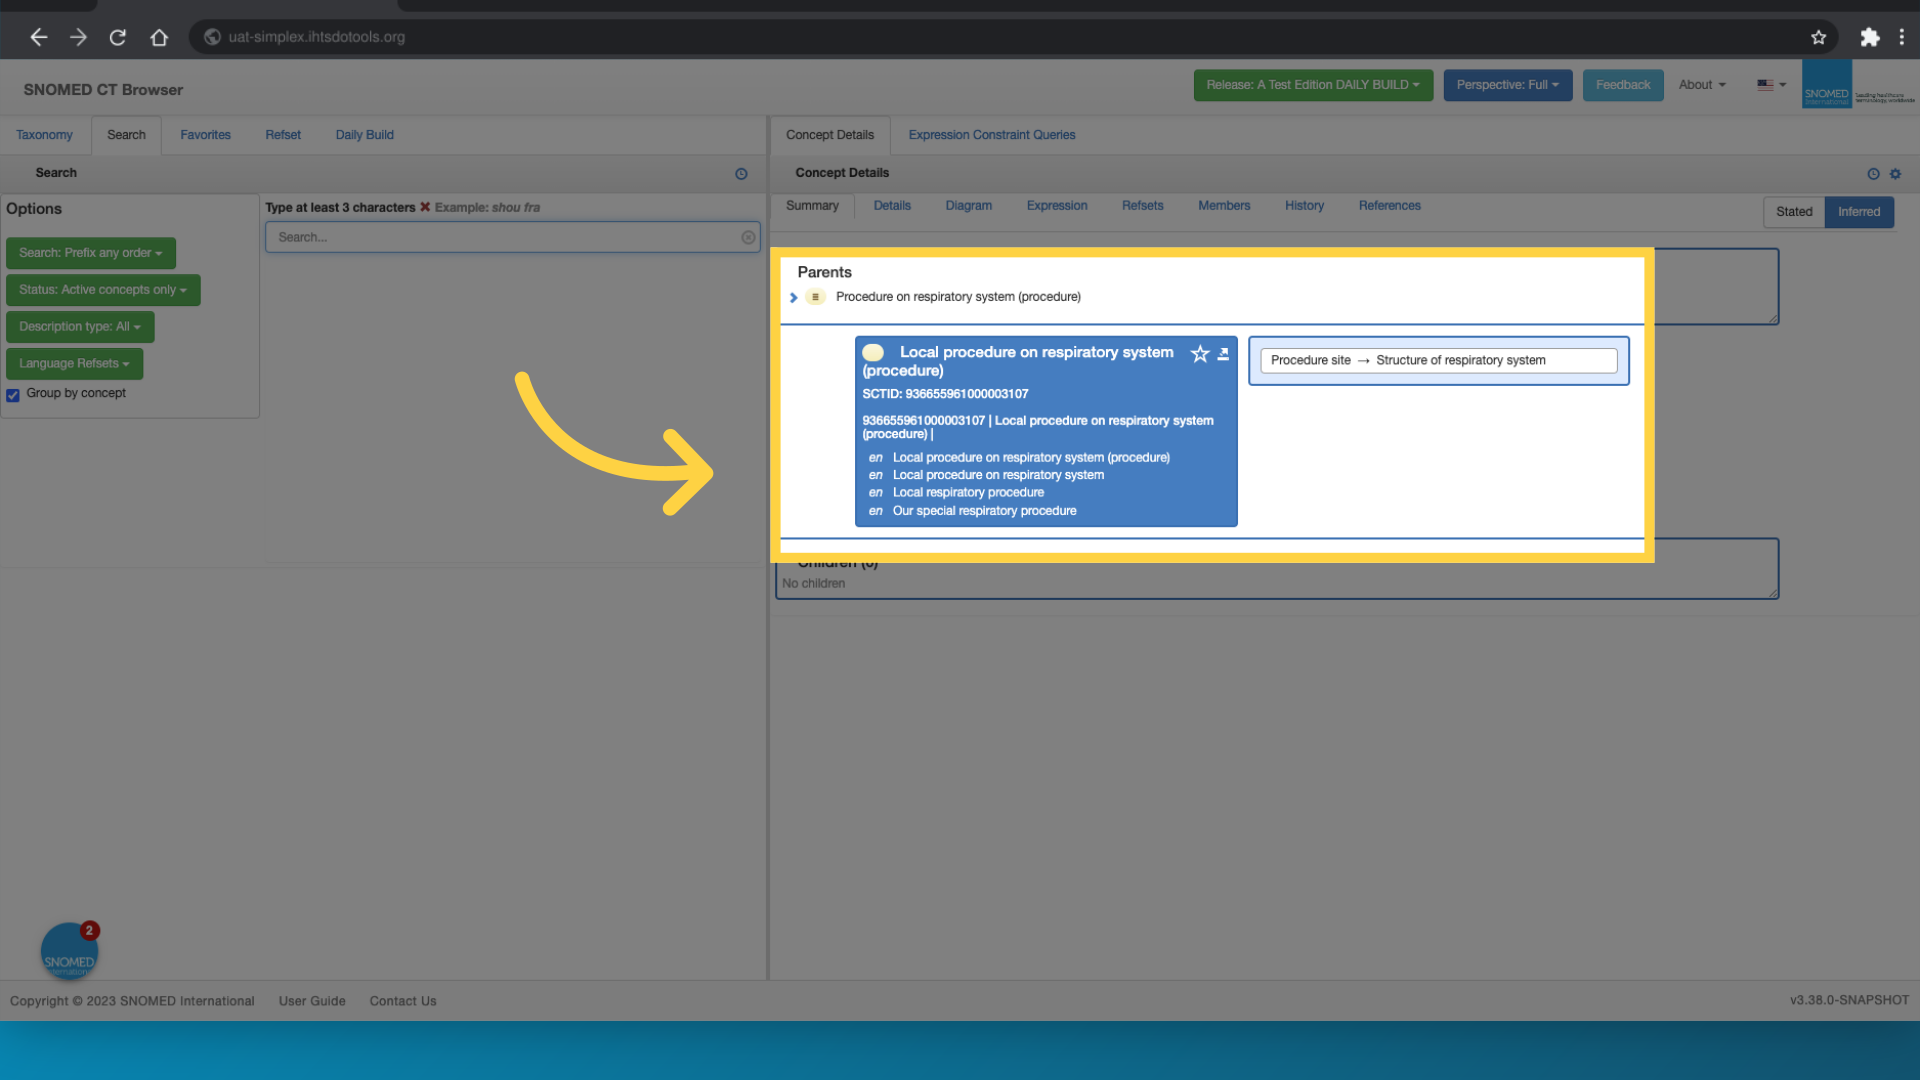
20. Review concept
In the browser, you can now see the concept appearing in the hierarchy as expected, with the parent you stated in the spreadsheet. You can also see the terms you stated as synonyms. Note that the concept has inherited the defining properties from its parent. In this example, the concept has a procedure site of 'Structure of respiratory system'
Thank you for watching this video.
Powered by guidde
Demonstration Video
.
